Wednesday, 26 February 2014

Rings And Gems!


I posted last week about Joopy Gems and the order of pretty 6mm rose cut cabochons I was eagerly waiting for. Well they arrived last Friday, which is pretty good going considering they were posted in Hong Kong on the Monday. And I didn't have to pay any VAT on them which was even better!


I was really impressed with the quality of the cabs and the faceted top side makes them sparkle nicely in the light. I got to work making rings with them that I'm going to start selling made to order. They do look very pretty so I'm just going to have to make myself a couple! I'm planning to add some plain textured silver stacking rings too so they can be mixed and matched with the gemstone rings.


I also made a couple of twist rings using thin strips of silver and copper to make stylised roses (use your imagination!) I think I'll just make these in particular sizes to start with rather than made to order...... but that may change!


I bought myself a proper ring mandrel too. I had been using an aluminium UK ring sizer not realising it wasn't a proper ring mandrel. I don't know how I thought it was as it's shorter and not as hard as steel so it's looking pretty sorry for itself now. You can see the shiny new steel version in the ring photo above. So there'll be no stopping me now :D

If you would like a 15% discount off your first order from Joopy Gems this link
will take you to a discount code that you can use with your order. I'm going to place another order with them very soon!

Thursday, 20 February 2014

A Real Gem - Joopy Gems


I decided last week that I was going to start making rings to sell. I've made a few for myself but so far have shied away from making them because of the possible size problem. By that I mean sending a ring off only for the buyer to contact me to say it's great but it's a bit too big/too small can you resize it? Making to order in the size the buyer asks for should hopefully make this a fairly rare occurance (I hope!) 

I'm going to start with stacking rings - plain and with gemstone cabochons as they seem very popular. I do have a lot of smooth cabs but after closer inspection I found a lot of them are a bit rough in places or even scratched. The saying "you get what you pay for" definitely rings true with cabochons! I've decided for my own sake and the sake of my jewellery it's worth spending more on stones to get the quality I would expect if I was buying handmade jewellery myself. There's nothing wrong with buying cabs in bulk for low prices but if half of them aren't useable it doesn't make much sense really.

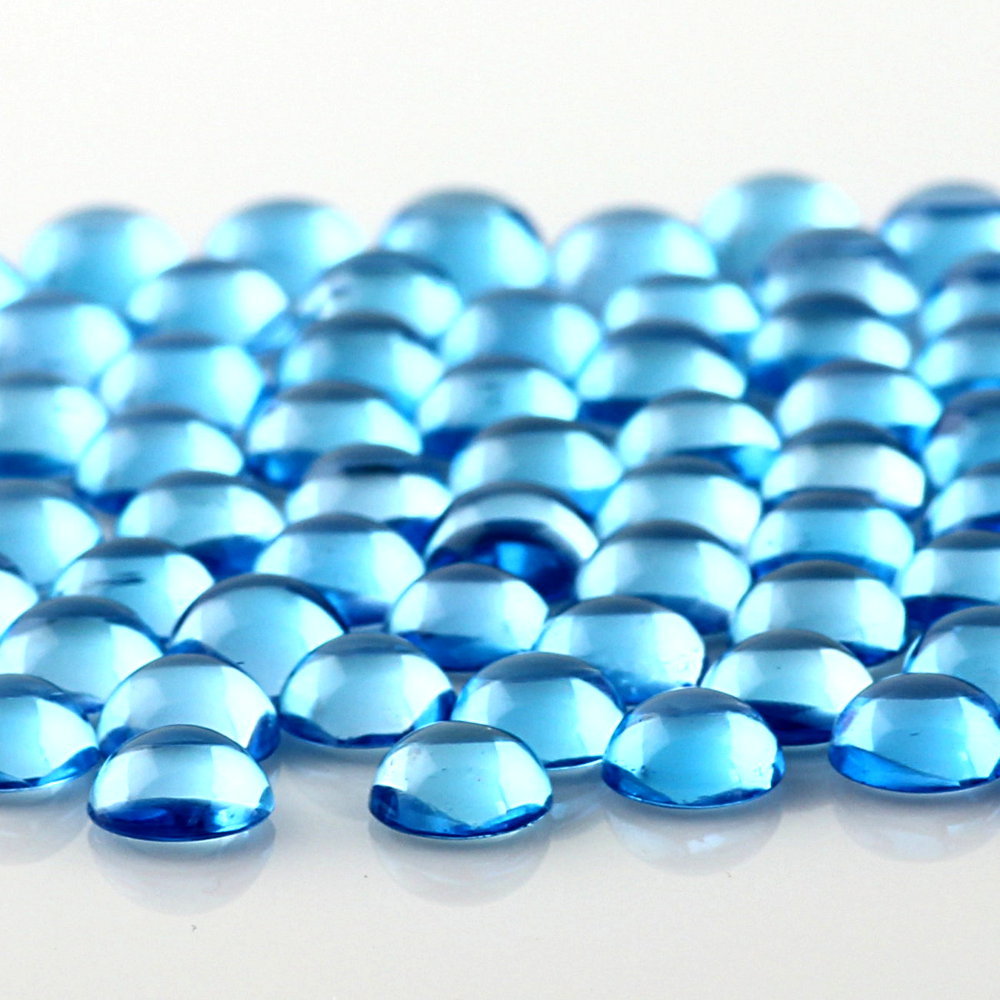
After a bit of research I fell in love with rose cut cabochons so the next step was to find a supplier. Rose cuts are cabs that are flat on the bottom and faceted on the top. As usual finding something a bit different is virtually impossible in the UK at the mo, Kernowcraft sell a limited selection but one of the best sources I've found is Joopy Gems. You can also find them on Etsy.


Joopy Gems is run by Brit Julia Aufenast. Based in Hong Kong Julia specialises in rose cut and faceted cabochons as well as smooth cabochons, faceted gemstones and a large range of pearls. What's nice to know is that Julia sources and selects all of the stones herself, seeing the stones in the rough before they are cut. The quality is high and the prices are reasonable. All the photos here are from the website and as you can see the cabs look lovely! I asked Julia if it was ok to do a blog post about her website and she was very happy for me to do so. She told me she has family in West Sussex and also here in Eastbourne so it really is a very small world!


I spent quite a long time deciding what I was going to buy as there is a lot to choose from. The prices are more than I've paid for cabs previously but the quality and choice make it worth it in my opinion. In the end I went for 6mm rose cut cabs in labradorite, prehnite, almandite garnet, amethyst, carnelian and blue chalcedony. A nice rang of colours but there were so many other stones I loved which will have to wait for next time! I did get 10% off my first order which helped too. I'll probably get clobbered for VAT by customs (about £14 according to their online calculator) but it will still make the total cost for each cab reasonable. The postage from Hong Kong was under £4 too which was a pleasant surprise.


15% off your first order!
So......have you fallen in love with these beautiful gemstones like I did? If so and you want to order some of these lovelies for yourself how does 15% off your first order sound?
The link will take you to a discount code to use when you place your first order - lovely!

I'm eagerly awaiting my first order and as soon as I've made some rings using the cabs I will write a post. I'm so keen for the cabs to arrive I've already made the ring bands!
And here just for the sake of it some more lovely gemstone and pearl photos.......


Thursday, 13 February 2014

Using Copper And Enamel To Make Your Own Cabochons


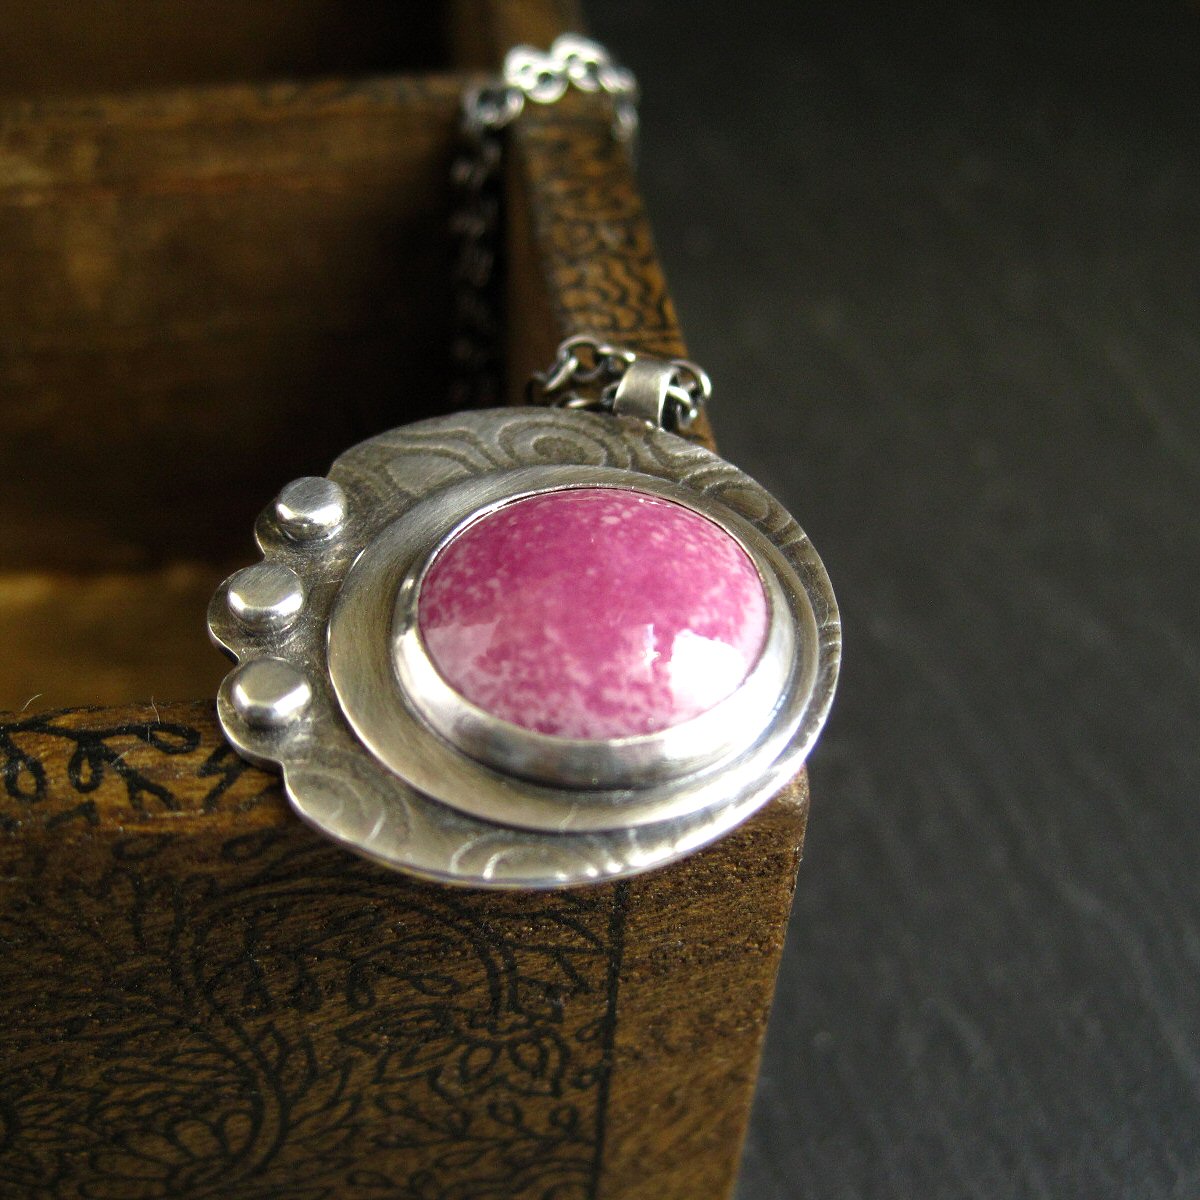
One of the things I wrote in my "things to do in the new year" list was to make more enamelled cabochons. I'd previously made a couple of 9mm small enamelled cabs which were a bit fiddly so I thought I'd make life a bit easier and go bigger this time. I also mixed the colours instead of sticking to just the one for a bit of variety. They are easy to make - just cut and dome a copper disc and enamel it! I still counter enamel the discs (just in case) then flip them over to do the fun side. You need to use a binder like Klere Fyre (which is spelt really oddly and I can never remember it!) as the domes are fairly steep and the enamel will fall off without something to stick to. Once they are done you carry on as with a normal cabochon. I use a wooden bezel pusher (an adapted peg in other words) as I invariably slip at some point when setting and I've had enough of ruining a piece at the very last stage by slipping and scratching the stone which is what usually happens when I use metal setting tools.

I made a pink cab using pastel pink opaque with a raspberry transparent on top and a green-turquoise version made with a blend of blues and greens topped with transparent turquoise. And here's what I did with them........


The turquoise green version is teamed with an amazonite cabs and silver textured using patterned card. I used sterling silver tube for the bail which is super easy if you just want something simple.


My new favourite jewellery-related programme at the moment is Gem Hunt which is on the Travel channel at 9pm week nights at the moment. It follows three "gem hunters" - a gem dealer, jewellery expert and a geologist as they travel abroad looking for gemstones for clients and for their own businesses. It's very American in that it tries to make everything seem very dramatic, constantly repeats what you already know and feels the need to explain what's going on despite the fact you've just watched what's going on....but the people are likeable and the gemstones they are looking for are stunning. They pay big prices for them but make absolute fortunes in some cases once they are cut and sold on. Worth a look if you are interested in gemstones :D

Thursday, 6 February 2014

Making Hollow Forms With Non-Conforming Dies


This term at jewellery night class we are learning about hollow forms, boxes and hinges. I'd prefer to try hinges at home myself where I can see better so I decided to try making hollow forms using a non-conforming die.
 A die is a tool that is used to shape metal. A non-comforming die consists of one part as opposed to a conforming die that consists of two parts such as a dapping punch and dapping block where the metal fits between the two and is formed into a domed/concave shape.

The die I made is called a silhouette die and consists of a shape cut out of the middle of a non-compressible material such as wood or acrylic. I cut this out using a jigsaw then filed it to smooth the shape a little. The hollow form will be formed by pushing the metal into the cutout.
The college doesn't have an hydraulic press so we were going to form the metal by hand using dapping punches which meant the next step was to make marks for the screws which would hold the metal in place.


After annealing a piece of 26g gauge copper that I'd added a spiral texture to using my Bigshot (pre rolling mill) I screwed it into place over the die with the screws just catching the edges rather than going though the metal. As you can see from the holes I overdid the number of screws a bit. I thought there would be a lot of pull on the metal as I formed it but surprisingly there wasn't.

I used dapping punches and a mallet to push the metal into the oval-shaped hole I cut out, removing once and annealing it in the middle of the process (all those screws!) I carried on forming it and ended up with quite a deep impression. The spiral texture was stretched a bit and was less obvious but it was still there.


The next step would be to flip the die over and do it all again with another piece of metal to create the mirror image back part of the hollow form. That was the plan until I noticed there was a split in the metal near the top! I'd gone just that bit too far with it and being very thin metal it gave way.


It was a shame but it was my first attempt and that is how you learn. Practice make perfect as they say! I have the die and screws at home so I'm going to repeat the process with some 22g copper and not take it as far this time.

The plan once I've formed the two halves is to trim around the outside of the shape on one half which will then sit inside the other half for soldering the two parts together. Then the excess metal is trimmed, filed and sanded to produce a neat solder line. A hole needs to be drilled somewhere to allow the hot air to escape from the middle of the hollow form during soldering to avoid it exploding. This could be holes for threading a chain through or maybe part of the design.

Hopefully if it all goes to plan this time I'll be posting my finished hollow form piece (without any splits) soon :D