Friday, 30 January 2015

New Earrings And Having Fun With Bronze Sheet


Continuing my experiments with and learning more about working with bronze, I had a go at etching some bronze sheet last week. It came out really well and behaved very similarly to copper. The only difference was it took slightly longer to etch than copper - about an hour and 45 minutes compared to 30 to 40 minutes with copper.


The design stamped on the bronze sheet.


The results of the etching after the first rinse. 


The etched sheet after removing the ink with nail varnish remover and giving it a scrub with steel wool.

So the next step was to make something with the etched bronze sheet! 
Heating and pickling bronze results in it being covered with layer of copper. I'm not sure if this occurs due to heat from the torch during annealing/soldering or if it's the result of the bronze going into the pickle {maybe someone will tell me} but the bronze has a definite copper hue after it's taken out of the pickle as you can see in this photo.


Luckily someone commented on one of my previous posts about bronze findings with the answer to this problem. Thank you Nana Louise!
Soaking the bronze in a mix of hydrogen peroxide and white vinegar - I used a 3:1 mix - for about 20 to 30 minutes then rinsing in white vinegar gets rid of the copper plating and restores the natural bronze colour.


Bubbles form on the bronze while it soaks in the hydrogen peroxide and white vinegar mix. Small brown patches appear on the metal as it cleans which can be removed by then soaking the bronze in white vinegar.


Restored to a nice bronze colour although the heart studs and curved earrings probably could have done with a bit longer in the "super" pickle.

After rinsing in water I cleaned the bronze earrings with steel wool which is my medium of choice when it comes to cleaning metal that's just been pickled. I find I can see the state of the metal better that way. I washed the earrings with washing up liquid and water to make sure they were grease free then I oxidized them in LOS. 

The finished earrings.


Etched bronze heart studs


Curved scalloped edge bronze earrings


 Malachite and etched bronze earrings

I'm in a quandry about this pair as you can see they don't hang totally vertically. They must be bottom-heavy {I know that feeling!} which I didn't consider when I came up with the design. I think they look ok and when worn aren't going to look too strange but part of me wants to cut them down to a wedge shape and add an earwire to the middle pierced hole so they hang with the malachite cab at the bottom....which would be a shame in a way but would satisfy the neat-freak perfectionist part of my brain.

So will I chop them down or won't I?
To be decided...... 

Friday, 23 January 2015

Experimenting With Liquid Enamel


 Something that's been on my to-do list for a while now is trying liquid enamel. I had a few weeks "break" over Christmas {not really a break as I was making new stuff!} so at long last I got round to ordering some of the liquid enamel powders. I got a few basic colours and a white so I could mix different shades. I also bought a white crackle base powder to experiment with.


I mixed up the colours with distilled water in totally unsuitable containers - too tall and thin and I've since bought some wider pots - and started painting. I applied the liquid enamels to a base of cream opaque and on two of the pieces I fired a layer of white crackle base before applying the liquid enamel.


Lumps in the enamel means I didn't mix properly!


Once I'd finished painting I set the copper pieces onto a warmed soldering block to speed up drying. When they were dry I started scratching designs {I use that word in the loosest possible context} into the dried enamel using a wooden skewer.


I then fired them using a torch. In my excitement I forgot which two had the crackle base. The effect you should get when you apply a liquid enamel on top of a crackle base and then fire it is the crackle base pushing through the top layer and creating a cracked effect but as you can see it didn't work very well on the two pieces I tried it with.


I did get the start of a crackled effect on the bottom corners of this piece but I did read it needs a larger area, in other words a bigger piece of copper, to work properly.


I liked the effect mixing the white liquid enamel powder with the other colours gave - a kind of speckled effect which reminds me of ceramic glazes. The "straight" colours with no white added came out a bit patchy in comparison but that may be because I got the mix too runny.

I then etched them all for a matt finish.


I still have work to do but it's a fun thing to try. I think it works better when you go with the flow rather than try to be too exact and it seems you can get different results with the colours depending on how long you fire them for - the oranges I mixed came out a bit on the pink side the first time I tried them then more orange the second time....

I did make a few pairs for sale but I feel the need for more practicing {and some more colours!} 

liquid enamel earrings


Friday, 16 January 2015

New Handmade Bronze Jewellery Findings

I  became intrigued with bronze a few weeks ago and decided to try using it to make some findings and bangles as a change from copper. Bronze is widely available in the UK but you do have to search a bit for the thicker gauges if that's what you're after. I found a lot of the thinner gauges at wires.co.uk for reasonable prices although it is more expensive than copper.

Bronze is an alloy of copper and tin but is also mixed with other materials like phosphor, zinc, aluminium and silicon which alters it's properties depending on what the bronze is to be used for. I think the bronze I have is phosphor bronze and I did expect it to behave very much like copper when heated. It does behave a lot like copper but it does have it's quirks too.......

Quirk #1  When you form a ball on the end of the bronze wire the heat causes the copper content to rise to the surface giving you in effect a copper ball end.


The first photo shows the bronze wire straight after forming the {copper} balls and the second photo shows the headpins after oxidizing and cleaning up with the return of nice bronze balls!

Pickling didn't make any difference to the balls and I found the only way to get rid of the copper was to scrub the ball vigorously with wire wool or a brass brush which is a bit too time consuming. The copper did disappear on the ball ends after the wire was oxidized in LOS and cleaned with wire wool though which was very handy {and a bit strange}.

Quirk #2  I had planned on making a shiny version of the ball end bronze findings but the ball and the wire near it doesn't clean up well after heating to form the ball as mentioned above so I didn't manage to get a lovely shiny version.

Quirke #3  The oxidized effect from using LOS doesn't seem to "stick" as well to bronze as it does to copper and therefore it only needs a quick 10 minutes in the tumbler to polish it up a bit. Otherwise you end up with oxidized bronze findings that are just too bright!

Quirk #4  The LOS seems to effect the bronze differently depending on whether the bronze wire was heated or not. The finished oxidized versions of the ball end earwires and the hoop earwires {where I used the wire without heating it in any way} are completely different. The ball end version has a darker finish and hints of purple whereas the unheated hoop version is fairly uniform in colour and a golden brown tone...


The ball end earwires were pickled clean before oxidizing but the surface colour was changed by heating which effected the end results of using the LOS. It looks like the copper rises to the surface when the bronze is heated. I should imagine heat patina-ing the bronze would be quite successful {haven't tried that yet}.
I'll be listing my bronze findings in my Etsy shop over the next week or so.

Bronze v Copper

The main differences I found between copper and bronze is that bronze is harder and has a lower melting temperature. It doesn't take as much heat to solder as copper which is a good thing. 
Looking at my photos the oxidized bronze looks very similar to oxidized copper but when you put the two side by side you can see the bronze is more golden brown compared to the red brown of copper.

I've made a few bronze bangles in 7g, 9g and 12g {3.5mm, 3.0mm and 2.0mm} which turned out fine. Working out how long to tumble them after oxidizing so they didn't come out too light took a couple of attempts though! I also have some bronze sheet that I will be experimenting with soon - probably some etching and also having a go at creating a heat patina. 
Stay tuned!


Thursday, 1 January 2015

Say Hello, Wave Goodbye - It's 2015!


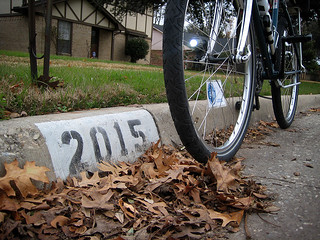
2015: Happy New Year from dickdavid
Photo: Richard Wezensky on Flickr {Creative Commons}

First things first - Happy New Year!! Here's hoping it will be a good one for us all.

The title of this post is from a song by Soft Cell from 1981. That was the year I left school and it was one of my favourite songs of that time. It made me think of seeing in the new year and saying farewell to the old.

I've been looking back at my posts through 2014 and I think one of the biggest turning points concerning my jewellery making was the decision to put a garden shed in what was already a pretty small backyard and turn it into my workshed or "shed of wonders" as my friend Nicki describes it.


This photo was taken shortly after I moved in to the shed in April 2014 when there was sunshine and it was warm enough to leave the door open.....At the moment I'm using an electric radiator in the shed which is ok and does take the chill off but it can get pretty cold in there at times, although a spot of soldering soon warms the place up and I have been known to turn off the radiator and open the door at times even when it's cold outside

It's changed slightly inside now as new tools and other stuff have appeared - a flexshaft to replace the Dremel, a new disc cutter, things have been attached to the walls so I can hang other things from them, another of those red Ikea storage drawer units.... I also replaced the small very rickety table I used to make my findings on with a proper desk which is so much better. The plant in the photo {on the shelf} couldn't cope with the cold and kept dropping it's leaves like confetti when I was soldering so it's been replaced with a cyclamen which does likes the cold. I've just about used up all the space in there on the floor and walls so I don't think I'll be adding anything else very soon. Although......

And so what will 2015 bring jewellery -wise?
My word of the moment is bronze. It's not a metal I've taken much notice of when it came to making jewellery or findings but after whipping up a few bangles using 2mm round bronze wire yesterday I was delighted with the result. The natural shiny colour of the bronze is beautiful, similar to rose gold in my opinion and nothing like that ugly yellow tone you get with brass. Apologies to any brass lovers but I just don't like it for jewellery.


{Bronze bangles in their natural shiny state - the pink colour reflected in the metal is from my bright pink camera! Must buy a silver coloured one next time.....}

I'm very much a lover of oxidized copper and silver but I do really like the colour of the bronze in it's normal shiny state. I made these bangles to find out how the bronze behaves when soldering and being shaped and hammered. I'm glad to say it's very much like copper but needs a bit less heat for soldering. I haven't attempted to oxidize it yet but I do know it takes LOS just like copper which is good to know.
After a bit of research on Etsy I've found that there's not that many people selling handmade bronze findings which got me thinking.....and ordering some 20g bronze wire!

I'm planning on adding bronze bangles and findings to my Etsy shop in the next few weeks. I'm currently having a break from my shop and website so I can catch up with things and get some new stock made. This time of year always makes me want to get organized and act on ideas I've had but never had the time to get round to actually doing. So despite the cold weather and chilly shed working conditions I'm really looking forward to what 2015 will bring