Thursday, 17 April 2014

A Refreshing Break And Some New Jewellery


I recently took a holiday from my online shops for the first time in nearly five years! Yes I actually put my Etsy and Folksy shops and my website in holiday mode for two weeks. And the reason for this? Did I jet off to the Seychelles/take a road trip across the States/ move all my jewellery tools, equipment and "stuff" into what was a garden shed but is now my jewellery workroom? All very exciting options but it was the last one, the other two will just have to wait until my next break in another five years! 

Yes, I now have my own space to work in which is like being in heaven after working on the dining room table and in the kitchen for nearly five years, having to get stuff out and put it away again (then get it out again when I realize I need to do a bit more soldering!) I love my jewellery shed, it's not quite there yet with the organizing and finding homes for everything but it's mine. I'm planning on writing a post about it next week with photos once I've finished the final tweaking.

I did take the opportunity to catch up with making new pieces once I'd moved into the shed as I didn't have to worry about stopping to do findings orders and other things that usually stop me making jewellery. It was lovely actually :D
I used some of the shiny, sparkly cabs and half-drilled pearls I bought from Joopy Gems and made a few pendants and several pairs of earrings...


This is a hollow form pendant I started at jewellery night class. It started life as two different size diameter pieces of copper tube that I added a front and back to and a white pearl cabochon. The etched design was from a really detailed stamp that I wasn't sure would work but it did and I think it's a lovely busy pattern.


I used some silver textured in my rolling mill and added some smooth silver as an overlay with pale pink rose quartz rose cut cabs. I think they look like freaky bugs!
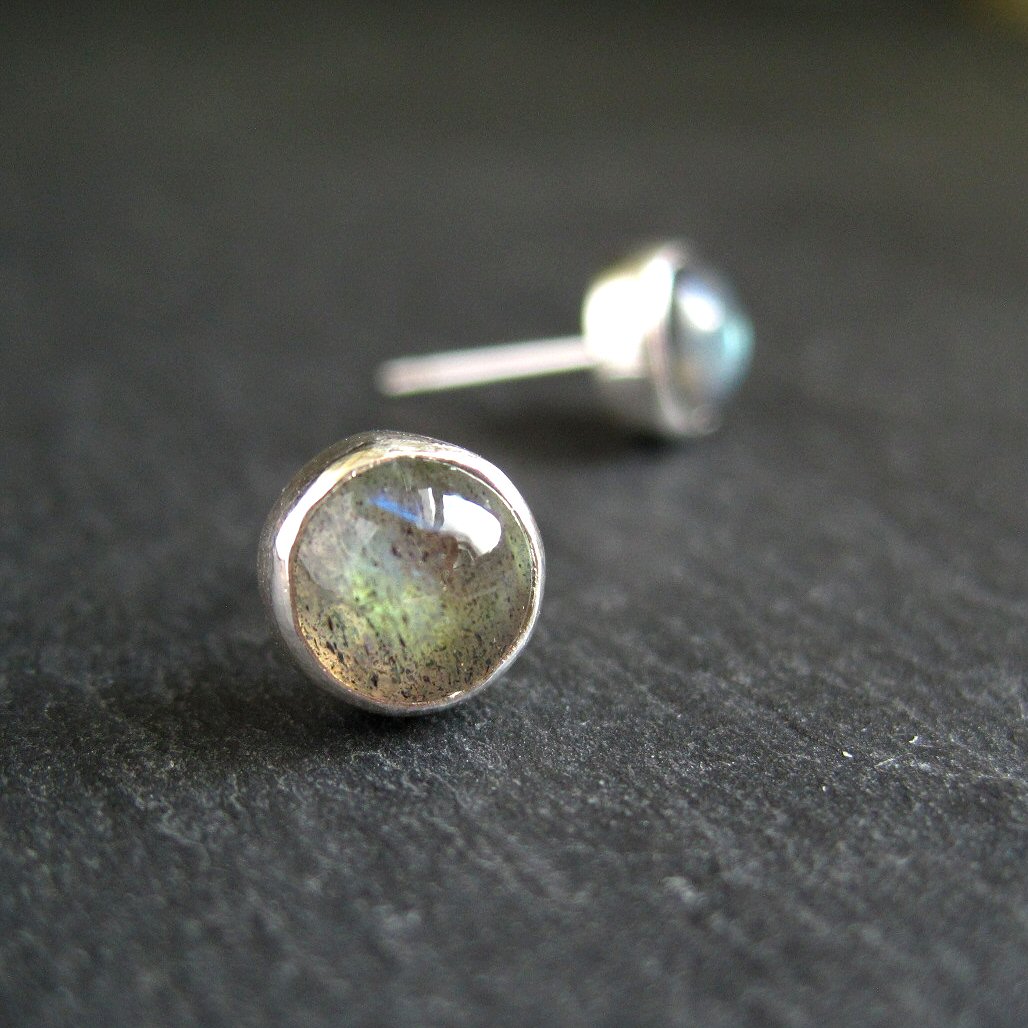


Believe it or not these are the first gemstone studs I've ever made plus a white pearl pair. The labradorite cabs have lovely flashes of green-gold and the peach moonstone are a sweet dot of colour.


These copper post earrings remind me of "spinning jennies" more formally known as the seeds of the ash tree. The green/gold quartz really sparkle in the light. This is the first time I've used posts in a longer style of earring rather than the usual stud style.


 And finally another two hollow form pairs I started at night class. These started life as round copper tube that I shaped using some bezel mandrels I bought a while ago. I always knew I'd find a use for those square/hexagon/triangle mandrels that were part of the set! I turned the square shapes into beads with a hole top and bottom and added them to some copper wire and thin tube to make a pair of twist earrings. The triangles have a leaf vein texture on the front and smooth sides and back. There's something very satisfying about making hollow forms and seeing the transformation from a solder covered piece of metal ( in my case anyway!) to a form that through filing and sanding ends up smooth with a barely visible solder line.

Look out for my post with photos (yay!) of my new workspace coming soon.


Tuesday, 18 March 2014

An Alternative To Jump Rings And Some New Enamel Pendants


Until recently I've always used jump rings to attach my enamel pendants to a chain. Enamel is great but some of the methods of attaching things to other things commonly used in jewellery, in other words cold connections and soldering can be a bit tricky when combined with it. It is possible to solder and rivet enamel pieces but not without some difficulty. So....I just used handmade jump rings and always felt vaguely dissatisfied with the final look.

Then I realized I could use my wirework experience and make my own bails! Why has it taken me so long to think of this? Who knows! I must have been thinking of "other things" (that means chocolate).
I made some new pendants last week, two with pierced out detail and finished them with a cold connected wire bail. 


Very simple in design - a length of 16g/1.2mm sterling round wire hammered at both ends and a hole drilled in the centre of the flattened areas. Tidy up the ends and bend into a loop then squeeze the ends gently so they sit close to the pendant on either side. Line up the holes then thread a balled up piece of 22g/0.6mm wire through and wrap around the loop to secure then trim and gently squeeze in the end. Oxidize and polish. Ta Dah! 


I think the bail makes the pendant look much more "finished" and is a vast improvement to a jump ring. You could also use this method to connect a smaller enamel piece to a large silver piece too. I'm also thinking that a small silver disc or decorative silver spacer would look nice sat between the ball and the front of the loop.
I'm just going to have to make some more enamel pendants and try!

••••

Friday, 7 March 2014

Pearls, Hoops And Stacking Rings


I'm slowly increasing my little collection of rings for sale. I made a set of three hammered sterling silver stacking rings which you can see in the photo above put together with a prehnite rose cab stacking ring. I made the plain band rings in the photo for me (for a change!) and find them so easy to wear.


 I photographed them in their bright shiny state then oxidized them and photographed them again. 
Etsy makes it easy to sell items with different variables like size or finish so the buyer can select when they pay. My website and Folksy shop don't have this option so I'll have to list the rings separately. I've learned that buyers don't always read everything in a listing ( something I'm also guilty of!) and I've had to contact a few to find out the size they want in the case of bangles bought from my website and Folksy. So expecting someone to remember to let me know the size, stone and finish they want in the case of my gemstone rings would be pushing it a bit! So when I get round to listing the gemstone rings on my website and Folksy shop they will all have to be listed separately with a large notice asking the buyer to let me know the size and finish they want in the hope they will actually do that and save my sanity! 


I spent the last couple of days making a pair of copper rose hoops and some silver disc earrings with pearls. The turn in the weather (it's sunny!) means I've been able to photograph them today.


I use copper bezel wire for the "roses" which makes life easier than having to cut thin strips of copper sheet myself. I solder the end closed then sand the bottom flat and solder to a flat piece of copper for a base. Having a flat base makes it easier to solder the rose to other things afterwards.


The pearls are beads I've had for years that are button shaped so most of them are ideal to turn into cabs. Sanding the bottom of the pearl makes it nice and level and lowers the holes so the bezel hides them when they are set. I like the look of pearls with oxidized silver. I have some bigger pearls on order which I'm really looking forward to using.


I'm hoping the pearls will arrive soon (tomorrow would be good!) so I can start thinking about what to do with them.