Thursday, 29 August 2013

Add Some Colourful Enamel Discs To Your Jewellery!


Here's the first batch of enamelled discs I made a couple of days ago that are slowly being listed on Etsy. Doing 36 at once was fun - I normally do about 4 - 6 at a time when I make enamelled stuff for jewellery but once the counter enamelling was done the best part of adding the colour went well and was quite relaxing to be honest, very therapeutic! Here's a few photos of some of the discs.......


Having made the very important decision as to which colours to go for ( I have quite a few!) I had to decide on size and quantity. I went for packs of 6 small 11mm discs with one hanging hole and packs of 4 discs slightly bigger at 13mm with two holes for now. The 6 disc packs feature 3 colours from the same colour group and the 4 packs 2 colours. The colours aren't set in stone and can be mixed. 


The backs of the discs are counter enamelled in black which stabilizes the enamel and copper and prevents cracking and each disc is enamelled with two layers of opaque enamel on the front. I was glad to find I hadn't thrown away a pretty lavender shade I had in a Soyer enamel. It's a great colour but has a high firing temp which doesn't make it a good idea for torch enamelling but it works ok for simple discs.


I dug out a yellow I had too but seldom use but I think it goes well with the orange and red.


Shades of blue - robins' egg, seafoam (one of my favourite shades) and aqua. I think I have to say that the greens are my favourite - the pea, mint and lichen look so nice together.


That Feeling You're Being Watched.............
Ever get that feeling? I was totally engrossed in the very important things we online sellers have to do on our computers, humming along to the Arctic Monkeys on Xfm when I felt I was being watched and turned round to this......


This is Tuppence. Known as Tuppers, she sits on my work table (previously known as the dining room table) usually on top of anything that gets in her way and just stares at the back of my head using her strange cat powers to make me turn round and give her food. She's like a silent watcher, always there when I turn round and I'm sure her main reason for being is so she can appear out of nowhere to leap onto my knee everytime I sit down in the front room.


She is very much a lady, despises my other two (male) cats and I'm pleased to say she understands what the word "no" means unlike my other two male cats.....

Thursday, 22 August 2013

Spots, Studs, Etching and Hoops - New Earrings


I've been pretty busy recently with findings orders and copper bangle orders - some of them from my website which is slowly picking up buyers thank goodness (patience is a virtue!) So now they're done and I've got a bit of time I thought I'd better get some earrings made for my shops.

I decided I like the spotty look you get with nail varnish and etching so I went for some spotty silver and copper studs first ..........


Then I used some more etched copper I've had waiting in the wings until it found it's true vocation in life.....
in other words a couple of pairs of simple, quick to make earrings!


Then I felt all hoop inspired and made a few pairs of silver hoops with added lampwork and ceramic flower beads. I do love a hoop :D


So now that I have a few new items to add to my shops and website over the next week I can relax and get on with the next thing that's running round my brain which is..........enamelled supplies for people to use in their own designs. It will be mainly discs at first in a choice of colours and a couple of sizes. I'd love to include enamelled headpins but when I tried enamelling headpins a long time ago the results were pretty varied with lots of them cracking and bits of enamel falling off sometimes minutes, hours or days after they were made. I've read this is normal for other people too so they won't be featuring in my enamelled findings range as they would be too unpredictable and stress inducing!

So now you know what I will be doing over the next few days!

Friday, 16 August 2013

Copper Bangles - Noisy But Nice


I made my first copper bangle at college night class a few months ago as I had some thick gauge copper wire and I wasn't sure what to make so thought a bangle sounded like a good idea. Here's my first attempt...


I soldered the coils on at home but before I did that I made a nice lot of noise at college hammering the bangle to give it some texture. Hammering's fine, it's just the noise it makes when you hammer a bangle on a metal bracelet mandrel! I didn't make anymore at college as I thought the hammering noise was probably annoying the others in the class......

I did carry on making more at home though once I'd got my own bracelet mandrel. The ringing noise created by the hammering on the mandrel really grates, drives my cats a bit mad and I'm still waiting for my neighbour to ask if I'm running some sort of foundry or something. I tried putting a sock over the mandrel with the bangle on top of the sock but it didn't make any difference and I just ended up with a sock with quite a few interesting holes. I shall persevere though and maybe wear earplugs as the bangles are proving popular.

My latest bangles are decorated with soldered shapes - leaves and ovals that I made from some textured and etched copper sheet.


They were fun to make once I figured the best way to solder the two shapes onto them. I've since bought some steel binding wire which I hope will make life easier the next time I make them. Getting everything in position and keeping it there when I was soldering them had me slightly frustrated shall we say! My third hand isn't the sturdiest and kept moving when I needed it to stay in position and hold the bangle vertically on top of the leaf/oval shapes. Hopefully using the binding wire will mean I can solder the two (maybe three?) shapes on at the same time instead of having to do them one at a time.


I'm planning on adding sterling silver shapes to the next lot of bangles I make. I checked with the London assay office and cleared up a subject I was confused about recently. I had been lead to believe by another jewellery maker a few years ago that any amount of sterling/fine silver on a mixed metal piece that weighed over 7.78g in total would mean the piece needed to be hallmarked. I did wonder about this as sometimes the amount of silver may be so small it would be impossible to hallmark it. I checked and the answer came back that on mixed metal pieces if the silver content is over 7.78g then it would need to be hallmarked, if the silver content is under 7.78g it doesn't. Which makes perfect sense and makes my life a lot easier.
So mixed metal bangles here I come! Soon.

Monday, 12 August 2013

Blog Of The Month in Beads And Beyond!


Do you read Beads and Beyond jewellery magazine? If so turn to page 55 in the September issue to see a little spotlight feature mentioning this blog as their Blog Of The Month! I was contacted by Jo of Beads and Beyond a couple of weeks ago and asked if they could feature my blog. Of course I said yes :D


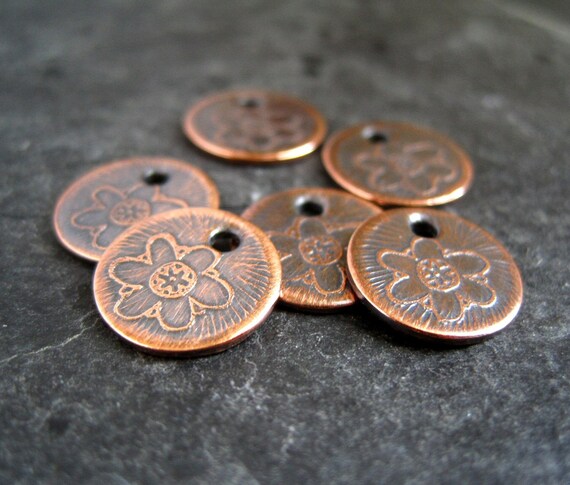
Another mention, this time in a Glossi online magazine publication created by Leah Curtis owner of Beady Eyed Bunny. Leah's online magazine called The Beading Glass features her own work, step-by-step jewellery tutorials and jewellery and findings by other artists. She kindly featured my etched copper flower charms in the magazine this time.


You can take a look at Leah's magazine by clicking the link below...


Glossi.com - The Beading Glass


Click to view The Beading Glass on GLOSSI.COM


I don't know about you but the prospect of publishing my own mini magazine is something that makes me feel quite excited. I've already signed up to Glossi! I know I'd love producing my own online magazine although I think a lot of thought and hard work will be necessary. Watch this space............... (but be patient I've got lots of other things I want to do first!)

Tuesday, 6 August 2013

Kernowcraft Gallery Feature!


A few weeks ago I received an email from Nathalie who works at Kernowcraft. She said she'd been doing "geeky" things and had noticed several views to the Kernowcraft website that she traced to my own Cinnamon Jewellery  website. I do have a page on my site where I've listed several of the places I buy my supplies from with links and did mention that I buy cabochons from Kernowcraft.

As a thank you Nathalie very kindly suggested that they include one of my pieces of jewellery on their Gallery of Jewellery Ideas page. I was thrilled to be honest and thought it was really nice of her! I chose my silver hollow form pendant with turquoise cabochon and I noticed today it's there in all it's glory! You can find the Gallery by clicking the "Jewellery Making Tips" link in the top navigation bar on the Kernowcraft website........
I took a screen shot of it too (can you tell I'm excited?!)


Thursday, 1 August 2013

Using Enamel Cabochons In My Jewellery


I know how to torch enamel and I know how to bezel set cabochons so I thought it was about time I put the two together! I've been thinking about it for "ages" and last week I actually got round to doing it. I started small (of course I did, I like to make life difficult!) and made four 9mm cabs from copper.

The enamelling was a bit tricky and Klyre Fire was called for so the enamel powder stuck to the front of the cab and didn't slide off. I discovered it was better to gently (very gently!) dry the klyre fire using my torch than let it air dry as it is very easy to knock the cab once the klyre fire is dry and watch the enamel slide right off. I got there in the end and produced two dusky pink and two sea green enamel cabs.


I was then slightly paranoid that they would crack but as they are formed (domed) and counter enamelled for added stability they were fine. I had to be a bit more careful than normal when it came to handling them and when I set them as they are a bit more delicate than stone cabs. I used my wooden bezel pusher - a customised peg in other words - to set them and it worked out fine. I made a copper and silver heart pendant using the zentangle etched copper I made recently and a pair of sterling silver disc earrings with the green enamel cabs.


I've yet to decide what to do with the second pink cab but at the mo I'm thinking a silver pendant.........maybe!
I enjoyed making both of these pieces and can feel myself slowly getting more confident with my soldering. I love that making my own enamelled cabs means I can make virtually whatever colour I want. Next time I'll make life easier and go bigger and will probably take photos too :D