Tuesday, 23 December 2014

All Bangled Out!


Yes it really has been a bangle-tastic very busy run up to Christmas in my Etsy shop and website with my copper and silver poppy bangle sets and singles proving to be the most popular choice with my buyers. Every time I checked my emails there would be one or two more bangle orders! I don't know what was going on but it certainly kept me busy for what felt like weeks. I counted up my bangle sales and discovered I'd made 103 bangles between the 1st November and 16th December. That together with made to order findings and earring sales {the earrings already made thankfully} I was starting to feel a little bit frazzled. And I still needed to do some more Christmas shopping and start writing my Christmas cards and do the ironing and lots of other very important stuff.....

As it got nearer to the cut off dates for Christmas posting to the US and within the UK I remembered what happened last Christmas with a few buyers wondering where their items were/could I make and send their order in the same day {yes, just!} and one bangle that was frantically ordered over the phone two days before Christmas. It was a scramble but thankfully everything arrived. But I just didn't want to do that again this year so I deactivated the bangle listings in my Etsy shop on the 16th.  Then the following evening I got a message on Etsy wondering what had happened to them I explained but then gave in when the buyer politely asked if I could just do one more for him....... He was very grateful but that was definitely it and I then put my Etsy shop on holiday and removed the shopping basket from my website.
  And heaved a sigh of relief.


This silver bangle with coil decoration was another popular choice this Christmas

I had planned on closing on the 24th for a couple of weeks to have a break and make some new stuff but I started to feel that if I saw another order for bangles I might just climb up onto the roof of my shed and throw myself off. Have no doubt I am so grateful for all the sales but I really need a break!!

So now I have some time to myself. I've got my cards written and the presents bought and went out for a boozy lunch with my friend. I've done those boring chores that needed doing. I also had time to unpack a little treat I bought myself recently. It had been sitting on the dining room table for about a week while I was still in the midst of my mad bangling session. It's this.....

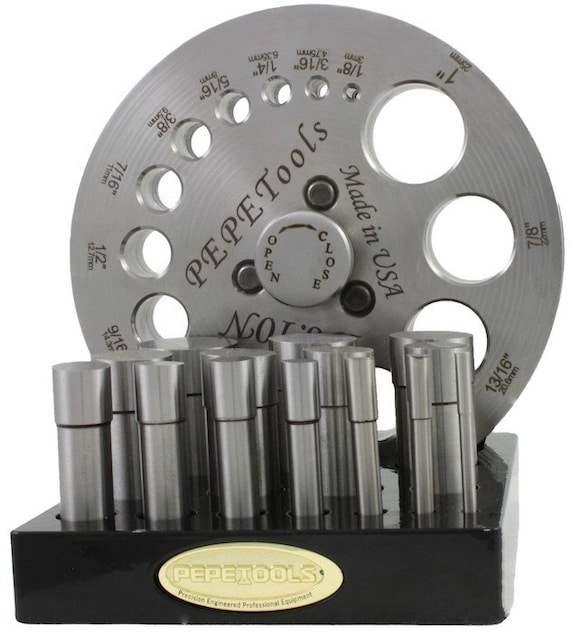
PepeTools Premium Disc Cutter Kit 1/8" - 1" 412-445

The Premium Pepe disc cutter. Quite expensive {say it quietly} compared to the economy versions I already own but it's a real beauty and it came with a set of centre finding punches which means I'll be able to make my own washers. I haven't got round to trying it yet but soon will!

 Even though my shop is closed I can't quite wean myself off Etsy and have been spending a bit of time on the forum reading lots of posts from sellers about their buyers complaining their item hadn't arrived yet and wanting a refund and one seller with 80 open orders two days before the cut off posting date who seemed quite chilled about it {complete madness!} I am quite happy that I can forget about all of that stuff for a while....although there is a chance I might still get an email from a buyer in America wondering if her last minute order will arrive before Christmas.....

I like this time of year as a lot of my jewellery that's been around for a while does tend to sell so it always inspires me to come up with some new designs for earrings and bangles and I also want to make more of the sgraffito enamel designs that I haven't had time to do yet and try again with resin. Having this spare time is dangerous though as I find things online that look interesting and I feel the need to try. The latest is anticlastic forming and I already have a stake and set of hammers lined up to buy "soon"........

Wishing everyone a very Merry Christmas!

Wednesday, 3 December 2014

Sweet Charlie


A different post from usual this week and a sad one too.
This is Charlie, my lovely 17 year old cat who had to be put to sleep on Monday. He became ill at the end of last week, and after several days of not eating and hiding himself away then struggling to walk I knew that this trip to the vet would be his last.
The vet could tell straight away from his eyes and ears that he was jaundiced and probably had a growth on his liver. There was nothing the vet could do to help so Charlie was sedated and gently put to sleep. And I've cried a lot for him.
Anyone reading this who doesn't have pets probably thinks that's a bit silly, those of you who do have pets will understand I'm sure.

He was the sweetest natured cat I've ever come across, born feral but very affectionate, miaowed when he wanted brushing {he loved being brushed} and had a bit of a rubber and bleach fetish. He also liked to chew any houseplant that vaguely resembled grass. The plant in the kitchen still bears his teethmarks.

He was loved and cared for and will be missed. Thank you for sharing your life with me Charlie


Friday, 28 November 2014

Jewellery Tools - In Praise Of The Mitre Jig


Like most metalwork jewellery makers I've developed a love of the tools I use and quite enjoy a browse in any shop that sells hammers and that kind of thing to see if there's something I could use. I sometimes come home with small toolish "things" that I don't even know the name of but think they look promising for use in my shed....

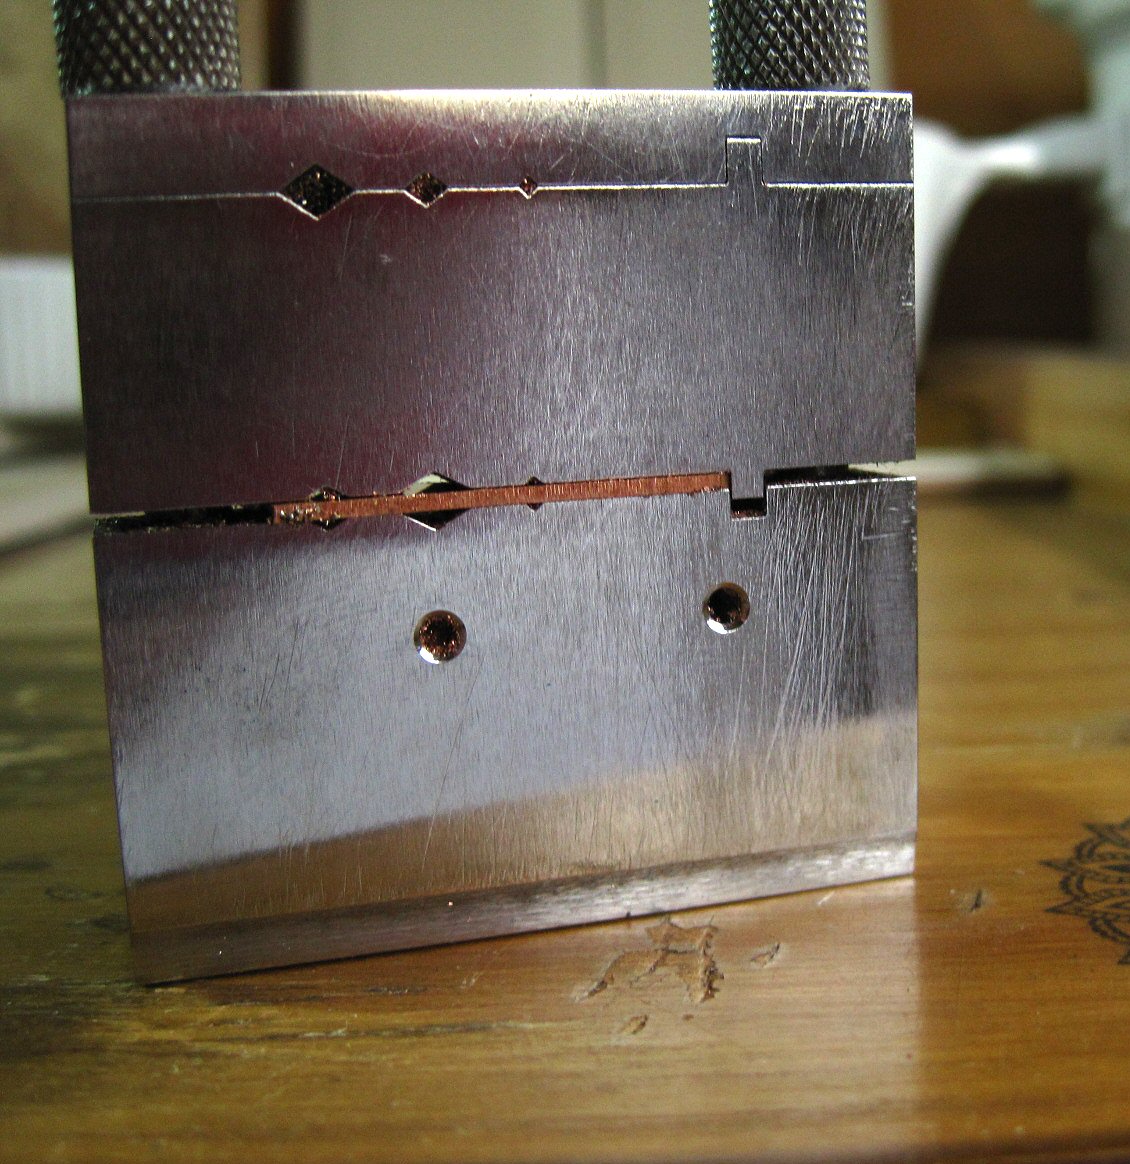
One of the tools that caught my eye recently was a mitre jig. A mitre jig or jeweller's jig is a small three part piece of steel that does some pretty wonderous things in the way of making a jewellery maker's life a lot easier!
I've come across mitre jigs before {but only from a distance} and knew they were used to get straight edges and angles on things and that joiners used them but it all looked a bit complicated and technical and precise which isn't a word that always applies to how I do things. But after watching a very useful video by David Wilson via Cookson Gold on how to use a mitre jig I realized I really needed one. After seeing the price of them at Cooksons {about £55!} I looked elsewhere and bought one from Cousins UK for about £27. The only difference is the Cousin's mitre jig only has one set of knurled {good word!} nuts on the top where the Cookson's version also has one of them on either side of the jig.

Enough about knurled nuts.....so what can you do with a mitre jig? You can do lots of very useful things in the way of getting a straight edge on wire, tube and sheet. I make a lot of bangles and where I previously would file the ends straight {which in my world meant not really that straight} by bracing the wire against my bench peg and filing I now use the mitre jig...


I undo the nuts {knurled} and feed the end of the wire into the relevant sized slot on the bottom section of the jig. This is the part you use to achieve a flat, straight edge to your metal. Tighten up the nuts and you are ready to file. I rested the jig on my bench peg with the end of the wire hanging down between the V slot on the bench peg. I then held the jig with one hand and filed right to left with the other hand until the end was flush with the surface of the jig. It takes seconds and gives you nice clean straight edges making soldering and clean up easier.


Filing the metal does produce a lip which you can see in this photo making the join look a bit wavy but you'll just have to believe me when I say there was no light between the ends when I held it up to the light and when it was soldered the solder jumped into the join with glee :D


Another good use for the jig is for filing a flat section on a ring band ready for soldering on a bezel. I usually brace against my bench peg to do this but as my bench peg isn't particularly level I normally end up with a flat area that tilts to one side so end up filing it several times before it's completely level. 
Using the mitre jig as a vice you can then file off a section of the ring band quickly and it will be totally flat so no more messing about holding it up and squinting at it to see if it's level which is what I tended to do.


You can also use the mitre jig to file a straight edge on sheet metal. If you know you already have one true straight edge you simply butt the metal up to the square notch which will make sure it's at the correct 90 degree angle then you can start filing. You can also use it to straighten up the ends of bezel wire {very useful!}, rings bands, etc, etc, in fact anything that needs a straight edge.


 You can also use your jeweller's saw with the mitre jig to remove excess metal or to cut tube if you don't have a tube cutter. It's so useful and I haven't even mentioned the top slot which does exactly the same as the bottom slot but at a 45 degree angle!

The video is worth watching but I was a bit puzzled at the part where he attaches the mitre jig to the piece of wood that can then be clamped into a vice. I couldn't work out how you would use it with the wood behind it as you wouldn't be able to feed the metal through from the back.....

I'm not affiliated with Cookson Gold or Cousins UK so this wasn't written to advertise their products..... I just wanted to share what a fab tool it was! And use the word knurled several times.


Friday, 14 November 2014

More Ice Resin Experiments........ and Mistakes!


Carrying on from my post last week about Ice Resin experiments, I made some matching pairs of the curly whirly swirly designs that I've decided I like the most. After getting fairly well matched pairs by bending two pieces of the copper wire at the same time using my pliers, I soldered all the points where the wires met and sanded the shapes flat giving myself two very sore finger ends in the process.
The next step was to add the coloured resin. I mixed up about 20ml for the first batch and divided it into four pots which I then coloured with acrylic paints.

My first mistake...
Attempting to do too much at once and ending up with a sticky mess. The acrylic paint does make the resin thicker and more glue-like and while the first two coloured resins were still fairly runny and easy enough to drip into the copper squiggles by the time I got to the last two I'd made from the first batch of resin they were very thick and sticky making adding them to the squiggles really hard. This resulted in blobs of resin in the wrong place, overflows and me sticking my thumb where it shouldn't go {no not there!} and making a mess of what was a decent job on one of the squiggles.

I did manage to rescue them all but there was a bit of overflowing and quite a bit of swearing. The next day I noticed some resin seepage from some of the unsoldered points that I thought were tight enough together not to leak which meant some of the resin was at a slightly lower level than other parts but again not to the point I couldn't save it. Using my jewellers saw made quick work of removing any resin that had seeped out too.

How to avoid the same mistake next time...
Mixing up a smaller amount of resin each time and maybe sticking to two colours at a time. Concentrating on two pairs of earrings at a time so I don't start panicking and ending up with many, many plastic pots and lots of very sticky toothpicks and lolly sticks and bits of kitchen roll and baby wipes and blobs of resin scattered on the table and the floor. It really was sight to behold.

Using the oven to cure resin
I've read that you can cure Ice Resin this way at temperatures between 90F to 135F so I thought I'd have a go using my gas oven set at the "S" {slow cook I presume} setting. This setting is really too high but I thought I'd try it anyway. I used some resin I'd poured into bottle caps for this and left it in the oven for over an hour.
Here is what happened to it...


My second mistake....
The results resemble an explosion in a plastics factory. It was too hot and left for too long but it is cured and very hard! I am going to try this again but next time I'll heat the oven then turn it off and put the resin on the bottom rather than the top shelf and keep an eye on it, probably taking it out every now and then to check it. It would be fab if I could get this to work as curing my resin takes about four days in the airing cupboard at the moment.

Copper and resin earring experiments
The results of the pierced and bowl designs I made last week were varied shall we say. One problem I didn't consider with the pierced design using textured copper was the fact that I couldn't sand it afterwards without losing the texture so any resin that I'd spilled around the edges {and not noticed} would protect the copper from the effects of the LOS leaving it bright compared to the oxidized copper.
 Like this...


So that's an idea I won't be repeating!
The other pair were fine I'm glad to say. I took a quick photo in the late afternoon on the window sill in my shed on a rainy day so apologies for it being dark.


I didn't sand the resin as I do prefer the shiny version. The marks you can see in it are a reflection.

So back to the curly whirly swirly designs...
I was a bit daunted that I was going to have to sand all of these but once I got going it wasn't too bad. I did use a large metal file and an abrasive disc with my flexshaft to start some of the very bumpy ones off which did leaves some gouges in the metal and resin but that will be sorted once I've finished all the sanding. I'm planning on sanding up to 1500 grit as I would like it to look as smooth as possible without going as far as polishing it. I used a glass brush in water to clean the resin in between sanding which really helped to remove the "dirt" that gets ingrained in it. 


I'm planning to oxidize the copper but after trying it earlier today on another piece and discovering that wire wool scratches resin and leaves it dirty {again!} I'm going to leave the copper dark and "polish" the oxidation in the tumbler.

I've now run out of coarse sandpaper so I had to stop and clear away lots of soggy pieces of 80 and 100 grit and the small puddle of water on my desk. I'm off to Homebase later to buy some more. The joys of making resin jewellery!
I'll post the finished photos of these next week.....


Friday, 7 November 2014

Experimenting With Ice Resin


Or should I say more experimenting with Ice Resin! As a continuation to my blog post last week I have been at it again and doing some more interesting things with epoxy resin. 

My first attempts didn't cure properly, possibly because I didn't measure the two parts accurately enough or it might have been because I didn't mix the acrylic paint properly before adding it to the resin. Anyway, my second attempts which were the swirly abstract shapes you can see in the bottom right photo below did cure I'm glad to say. They are now leaning up against my work shed window and look really pretty with the light shining through them :D 


So armed with slightly more but still a fairly small amount of knowledge about resin I tried again on Wednesday. I made a few pairs of copper earrings, one with two little copper bowls soldered to the bottom and two more with pierced out shapes, then added some coloured resin.


In my haste to get going with the resin I didn't make sure the copper was clean so ended up with some copper dust in the bright green resin in the bullet shape earrings top left. I also wasn't very keen on my colour choices for the bullet shape earrings.......

I then mixed some more resin for a pendant and used some pretty pinks and oranges {which I did like!} Please excuse the poor photo but the light was going by the time I took it.


I took some more photos in the slightly better {but not much} light yesterday morning after they'd had several hours in the airing cupboard. I discovered a hair in one of the purple rectangles in the bullet earrings but as I don't like these very much anyway I'm not too bothered! They'll need a couple more days to cure properly then I'll oxidize the copper and add earwires to the other two pairs.


I'm not sure whether to sand the two resin "dots" completely flat in these earrings or leave them. Decisions! You can see my camera reflected in them as I took the photo, it's not another hair :D

I've got to say I am more drawn to the abstract squiggly wire designs and would really like to make earrings using this design. Which means creating a matching pair.... 

I flattened and soldered some more copper wire and rounded it to smooth out any kinks then started playing with my graduated pliers.


I soon discovered the smaller lengths of wire weren't long enough to be able to make anything big enough so I ended up with just one pair of fairly well matched earrings in the making....


These now need to be soldered at the points where the wires touch then filed and sanded flat. Then I'll solder a piece of copper tube to the top for the earwire. I'm really keen to get some more earrings made so I spent some time yesterday afternoon making more lengths of flattened wire - longer this time so I can make a few more pairs today.

Then I'll be able to get the resin and acrylic paints out again and start playing!

The results of all this and the finished earrings should hopefully be posted next week.....


Thursday, 30 October 2014

Around The World Blog Hop - Cinnamon Jewellery


Around the World Blog Hop

The idea behind the blog hop is for creative bloggers to write a post based around a couple of set questions. Their answers offer an insight into their creative thoughts and processes. The blog 'baton' is then passed on to a fellow artisan and so the trip around the globe gathers pace.

I was very kindly asked by Heather of Little Ram Studio on Etsy to continue the hop. Heather and her husband Gary create delightful lino cut prints of British wildlife, dogs and beautiful landscapes. You can read Heather and Gary's Hop post on their lovely blog Studio Tales.


What am I working on?
I've recently become very interested in using resin in jewellery after watching several videos by Jennie Milner , a US jewellery maker. Her work combines metalwork, art and resin and the result is colourful and fun jewellery.
I'm very drawn to colour in jewellery so once I found out you can colour epoxy resin whatever colour you like {yippee!} I was hooked and quickly ordered my Ice Resin starter kit.

I've literally just been playing around with it this week and have made a few practice pieces in order to discover what can go wrong and how to fix it....


The main problem I encountered is bubbles! The pot of mixed resin {top right} is full of millions of tiny bubbles. This is a problem a lot of people have and is solved by making sure the resin is warm. My resin and hardener were stored in my shed which during October in the UK cannot ever be described as warm! Adding the acrylic paint did help to get rid of a lot of the bubbles and the advice to breathe on the resin or use a flame to gently pop the bubbles also helped.

I decided to have another go the following day, this time I warmed the resin and hardener in a jug of hot water before I started, then again after mixing. This definitely helped a lot and although there were still some bubbles in the resin it was a lot less than the first time. This time I added the resin to some backless copper shapes I'd originally made to set some stones on but I thought they would be perfect for resin instead.


The results of my initial resin experimenting are bottom right. There are some issues such as streaks in the colour and tiny pits where new bubbles have risen to the surface and popped during curing. They still need another day to cure {set} properly before I can do anything else to them such as sanding or drilling. 

I still have a lot to discover and learn about using resin so this is an experiment that will be continued until I get it right. It could take a while......


How does my work differ from others in its genre?
In the past my jewellery has been described as dramatic and bold which isn't how I see it at all! I see it as a mixture of rustic, fairly simple designs with bursts of colour. I have been influenced a lot by the jewellery trends in the US and absolutely love working with copper. I think one of the things that maybe identifies my jewellery is pattern and texture on metal. I will always add texture to a metalwork piece using the rolling mill or by etching as I think it adds interest and works well when the metal is oxidized with liver of sulphur to give it an antique patina finish.


Sterling silver pendant with enamel cabochon

I also enjoy using enamel which I fire with a torch. It's a fairly inexpensive way to add a real splash of colour and I've recently started using enamel decals to add a further touch of interest to earrings and pendants.

The most important thing is that I haven't got to a point yet where I'm content to stop learning and focus on one particular technique - I love discovering new techniques and buying new tools {the latest is a mitre jig} which is why my jewellery style is pretty varied. I don't do "collections" as making the same items over and over would drive me nuts!


Torch enamel earrings with enamel decal

Why do I create what I do?
I was never particularly artistic when I was younger but I've found as I get older making things is a really good way to relax and forget the world for a while. It's like a bit of free therapy in a way. 
My thing about earrings is what made me start making jewellery - I saw some handmade jewellery online while I was shopping for earrings one day and it struck me that I could probably do that too. How fabulous would it be to make your own earrings? Very fabulous indeed  and I haven't stopped since.
I think I'm forever hoping to make that elusive "perfect" piece of jewellery and until I do I will continue to make new pieces and learn new techniques. I doubt I'll ever get there to be honest but the thought of it is what keeps me going!


Etched sterling silver earrings with freshwater pearl

How does my creating process work?
It varies. Sometimes I will have a very definite idea of what I'm going to make and at other times a design will just evolve and morph as I go. 
I recently started making a new copper bangle design featuring a silver poppy with silver wire wrapped around part of the copper bangle and soldered in place. 


Copper bangle with sterling silver poppy  

This came out virtually how I imagined it apart from a slight change to how the silver poppy is attached. The mechanics of a piece need to be considered too and I'm always concious of how wearable a piece will be. You can't have anything falling off or causing any kind of damage to skin or clothes.

I do sketch ideas in a pad and on bits of paper that are then stuck to my shed wall for when I need a bit of inspiration. I tend to be influenced by shapes a lot and I'm very fond of organic pebble-like shapes, swirls and dots. 
Sometimes the finished piece will look completely different to the original idea I had but that's fine, it's a good way to discover what works and what doesn't and makes the process more streamlined next time you make it. Some of my, let's call them experiments, are the one's that sell the fastest!

I hope you've enjoyed reading this and will check out the next post on the Blog Hop which will be written by Kristen of K S Jewellery Designs. Kristen makes beautiful sterling silver wirework and metalwork jewellery and if you love flowers you'll love her jewellery!


Wednesday, 8 October 2014

New Enamel And Copper Leaf Studs And Something Nice For Me

All of the enamel studs I had on my website have found a new home in Australia so it was lucky I'd made a start on a few new pairs a couple of weeks ago to replace them.
I mixed up some new opaque colour blends which I've christened rather grandly Apple, Denim and Amethyst. I've only just come up with the name for the purple mix - it was formerly just called "the purple one". Sounds a bit like Prince.☺

I also made some copper leaf studs using a leaf stamp design that I etched onto the copper then cut round and soldered sterling silver posts to the back.


Very simple but cute. These and the enamel studs are soon to be appearing in my Etsy shop and website.

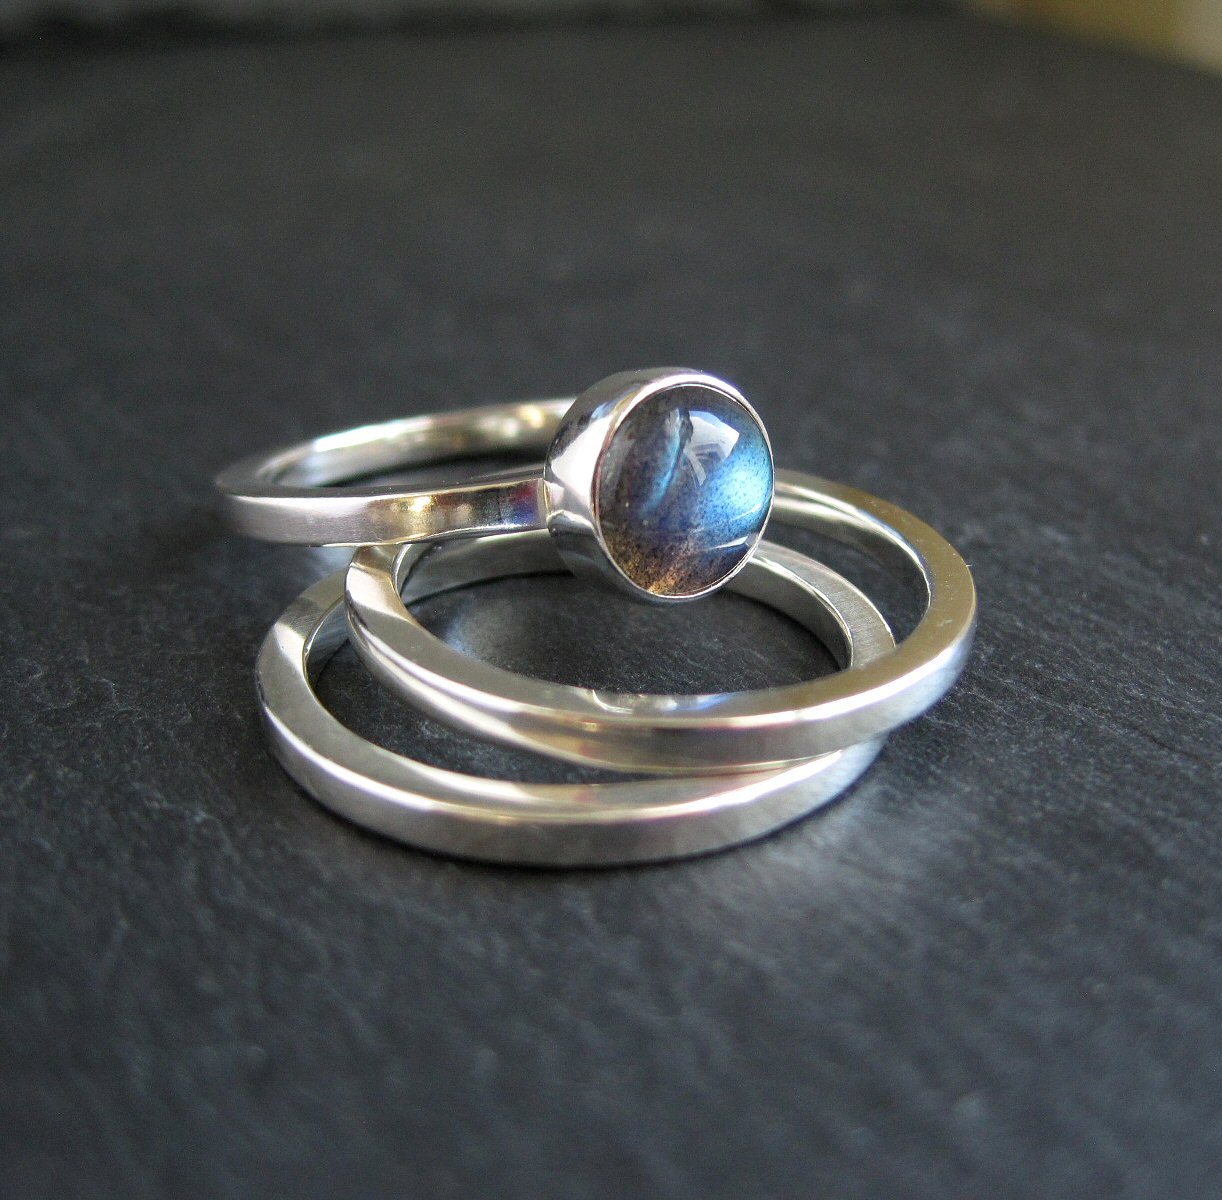
As it's my birthday next Friday (17th) I decided to treat myself to some new rings. I used 2mm square sterling wire for the first time ever and I really like the look of it. I'm now thinking of making some silver bangles using the square wire........


I used a lovely labradorite cab for one of the rings. It's a milestone birthday and I am quite shocked when I say the number out loud. I can't bring myself to actually type it yet but let's just say it's not 40. Luckily most people don't think I look as "old" as I am!

I've been dithering over what to buy as a birthday present to myself and have now decided to get a Foredom Flexshaft. I've managed pretty well with my Dremel but it does have a mind of it's own when it comes to what speed it's going to go at and it does mean you need one hand free to switch it on and off. The thought of a flex shaft with a foot pedal and slim handpiece seems like bliss after holding a heavy Dremel all this time.
 I shall be ordering one very soon.


Thursday, 2 October 2014

Torch Enamelling - Experimenting With Sgraffito


To continue my current tiny obsession with torch enamelling and decorative things you can do with your enamelled jewellery, I thought I'd experiment with sgraffito. The word sgraffito means "scratched" in Italian and according the the Encyclopedia Britannica is "a technique used in painting, pottery and glass which consists of putting down a preliminary surface, covering it with another, then scratching the superficial layer in such a way that the pattern or shape that emerges is of the lower colour"

A friend sent me a copy of a bracelet tutorial {thanks Debs!} by Angela Gerhard who creates the most beautiful enamel jewellery decorated using sgraffito. I'd love to post a couple of photos of it here but I remember doing an enamel treasury on Etsy a while ago and seeing a little note on her shop page about her photos being copyrighted so I will respect that - although if you Google her you'll see lots of her jewellery photos everywhere!

I decided to have a go at sgraffito this week. I cut several pieces of 24g/0.5mm copper to practice on. Some of them are bigger pieces than I normally use but I wanted a bit of space to play. I counter enamelled them then enamelled the front - two in black, two in purple and three in cream.

In the Angela Gerhard tutorial the next step is to apply a layer of liquid enamel but as I don't have any yet I used Klyre Fire which I applied liberally with a brush.


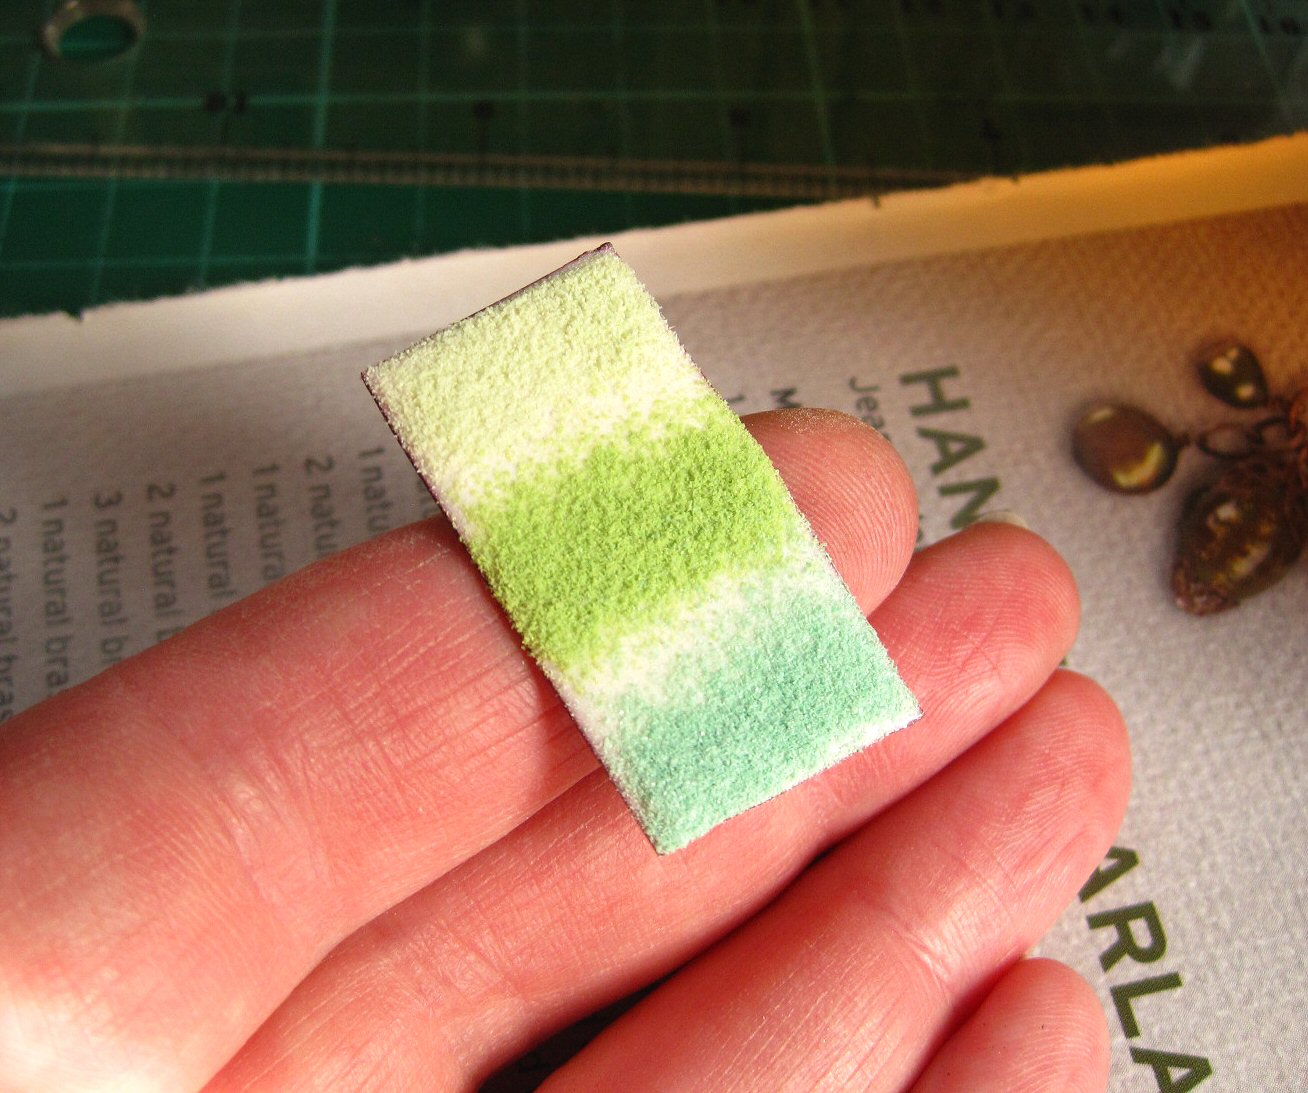
I hope you can tear your eyes away from the ripped out magazine page featuring a step-by-step wirework necklace project I used to sift onto. I don't think I could have picked a brighter, more distracting background for this photo if I tried... 
The next step in the tutorial was to sift a layer of powder enamel on top of the liquid enamel. I sifted a layer of enamel onto the Klyre Fire and pressed it down gently with my finger.


I then used a variety of tools - an engineer's scribe, a fine brush and rubber tipped "things" I acquired a while ago to create the lines. The layer of enamel on this piece was too thick which results in a lot of the enamel powder piling up at the sides of the lines {a bit like snow when a snow plough has been through}. You then need to remove these little piles of enamel by using a bulb syringe {as in the tutorial} to gently blow them away or you can use a dampened brush. Otherwise they create thicker areas of enamel that take longer to fire.


I had another go using a cream base and a thinner layer of three greens. I left a gap between the different greens too then used a small brush to create the lines. It definitely helps to have a pot of water handy to clean the brush and a piece of kitchen towel to blot the brush on to keep it clean between doing each line. The damp brush picks up the particles of enamel too giving you a neater finish to the lines if that's the look you're aiming for.


I fired each piece then lined them up on my shed windowsill to photograph {top photo}. I then decided to etch them as I love the matt finish it gives. Here are the results...


 What I've learned....

1.The first is I need to apply two layers of counter enamel if I want to make larger pieces. The counter enamel on a couple of the pieces took a bit of a battering but that could be due to the enamel on the front being too thick and taking longer than normal to fully fire.

2. A thinner top layer of powder enamel is better for achieving thinner lines.

3. I found drawing straight lines was easier with a brush than anything else.

4. I need a finer brush! The {cheap} brushes I buy seem to swell a bit when they get wet which doesn't make it easy to achieve neat lines. 

5. Although I like bright colours I'm drawn more to the cream background than the black. I'm also trying hard to ignore the purple and green colour combo I created, it's hideous!

6. I need to let go of my inner neat-freak and just go with it. I learned that the more precise you try to be with some enamelling techniques the worse the end result looks.

7.The matt look is very cool. Very.

8. I need to practice more.
 A lot more