Showing posts with label copper bangles. Show all posts

Thursday, 9 July 2015

New Designs - Enamel Earrings And Copper Bangles


I've been trying out some new designs with my enamel earrings recently by combining a layer of etched copper and a layer of enamel beneath it. The copper layer has pierced out sections which allow the enamel colour to show through as the earrings are worn. I've made just two pairs for now in orange and blue and it's possible the design idea may evolve if I think hard enough about it....... :D


I've also made a few new copper bangle designs partly as a result of a custom order for two bangles in sterling silver. Having copper wire meant I could try out what my customer was asking for using a less expensive metal first until a decision was made.
This inspired me to make a couple of new designs and an improved version of a recent addition to my bangle-ing enterprises.
The first is a hammered copper bangle made from 4mm round wire.


I kept the round shape by hammering the texture before the bangle was soldered {which was quite a lot of hammering!} instead of what I normally do which is to solder the wire then hammer the texture when the bangle is on the bangle mandrel which results in the wire being flattened slightly. The result is a lovely chunky, substantial bangle.

The second new design is a triple set of textured bangles with three rounded square shape rings linking them together.


I also made another loopy bangle this time making sure I had enough wire to form 7 loops instead of the 6 loops I made with the first attempt. The loops are also more upright than the first bangle.
I think it looks like a little copper tiara.......


Having an odd number of loops in the new version means the straight part of the wire is at the same level at either end of the loops rather than at opposite points as it was with the first attempt you can see in the photos here...


I'm very tempted to make a bangle that is almost entirely loops with a small section of straight wire for the join. I think that idea might need a bit of tweaking and the copper wire a lot of annealing but I'm sure it will be do-able!


Copyright © 2015 Cinnamon Jewellery. All rights reserved.

Thursday, 30 October 2014

Around The World Blog Hop - Cinnamon Jewellery


Around the World Blog Hop

The idea behind the blog hop is for creative bloggers to write a post based around a couple of set questions. Their answers offer an insight into their creative thoughts and processes. The blog 'baton' is then passed on to a fellow artisan and so the trip around the globe gathers pace.

I was very kindly asked by Heather of Little Ram Studio on Etsy to continue the hop. Heather and her husband Gary create delightful lino cut prints of British wildlife, dogs and beautiful landscapes. You can read Heather and Gary's Hop post on their lovely blog Studio Tales.


What am I working on?
I've recently become very interested in using resin in jewellery after watching several videos by Jennie Milner , a US jewellery maker. Her work combines metalwork, art and resin and the result is colourful and fun jewellery.
I'm very drawn to colour in jewellery so once I found out you can colour epoxy resin whatever colour you like {yippee!} I was hooked and quickly ordered my Ice Resin starter kit.

I've literally just been playing around with it this week and have made a few practice pieces in order to discover what can go wrong and how to fix it....


The main problem I encountered is bubbles! The pot of mixed resin {top right} is full of millions of tiny bubbles. This is a problem a lot of people have and is solved by making sure the resin is warm. My resin and hardener were stored in my shed which during October in the UK cannot ever be described as warm! Adding the acrylic paint did help to get rid of a lot of the bubbles and the advice to breathe on the resin or use a flame to gently pop the bubbles also helped.

I decided to have another go the following day, this time I warmed the resin and hardener in a jug of hot water before I started, then again after mixing. This definitely helped a lot and although there were still some bubbles in the resin it was a lot less than the first time. This time I added the resin to some backless copper shapes I'd originally made to set some stones on but I thought they would be perfect for resin instead.


The results of my initial resin experimenting are bottom right. There are some issues such as streaks in the colour and tiny pits where new bubbles have risen to the surface and popped during curing. They still need another day to cure {set} properly before I can do anything else to them such as sanding or drilling. 

I still have a lot to discover and learn about using resin so this is an experiment that will be continued until I get it right. It could take a while......


How does my work differ from others in its genre?
In the past my jewellery has been described as dramatic and bold which isn't how I see it at all! I see it as a mixture of rustic, fairly simple designs with bursts of colour. I have been influenced a lot by the jewellery trends in the US and absolutely love working with copper. I think one of the things that maybe identifies my jewellery is pattern and texture on metal. I will always add texture to a metalwork piece using the rolling mill or by etching as I think it adds interest and works well when the metal is oxidized with liver of sulphur to give it an antique patina finish.


Sterling silver pendant with enamel cabochon

I also enjoy using enamel which I fire with a torch. It's a fairly inexpensive way to add a real splash of colour and I've recently started using enamel decals to add a further touch of interest to earrings and pendants.

The most important thing is that I haven't got to a point yet where I'm content to stop learning and focus on one particular technique - I love discovering new techniques and buying new tools {the latest is a mitre jig} which is why my jewellery style is pretty varied. I don't do "collections" as making the same items over and over would drive me nuts!


Torch enamel earrings with enamel decal

Why do I create what I do?
I was never particularly artistic when I was younger but I've found as I get older making things is a really good way to relax and forget the world for a while. It's like a bit of free therapy in a way. 
My thing about earrings is what made me start making jewellery - I saw some handmade jewellery online while I was shopping for earrings one day and it struck me that I could probably do that too. How fabulous would it be to make your own earrings? Very fabulous indeed  and I haven't stopped since.
I think I'm forever hoping to make that elusive "perfect" piece of jewellery and until I do I will continue to make new pieces and learn new techniques. I doubt I'll ever get there to be honest but the thought of it is what keeps me going!


Etched sterling silver earrings with freshwater pearl

How does my creating process work?
It varies. Sometimes I will have a very definite idea of what I'm going to make and at other times a design will just evolve and morph as I go. 
I recently started making a new copper bangle design featuring a silver poppy with silver wire wrapped around part of the copper bangle and soldered in place. 


Copper bangle with sterling silver poppy  

This came out virtually how I imagined it apart from a slight change to how the silver poppy is attached. The mechanics of a piece need to be considered too and I'm always concious of how wearable a piece will be. You can't have anything falling off or causing any kind of damage to skin or clothes.

I do sketch ideas in a pad and on bits of paper that are then stuck to my shed wall for when I need a bit of inspiration. I tend to be influenced by shapes a lot and I'm very fond of organic pebble-like shapes, swirls and dots. 
Sometimes the finished piece will look completely different to the original idea I had but that's fine, it's a good way to discover what works and what doesn't and makes the process more streamlined next time you make it. Some of my, let's call them experiments, are the one's that sell the fastest!

I hope you've enjoyed reading this and will check out the next post on the Blog Hop which will be written by Kristen of K S Jewellery Designs. Kristen makes beautiful sterling silver wirework and metalwork jewellery and if you love flowers you'll love her jewellery!


Wednesday, 18 December 2013

And Relax...........

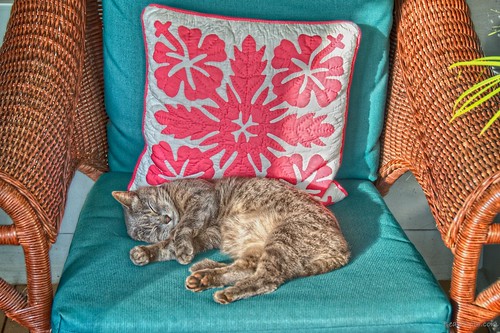
Cat Nap

photo courtesy of Andy Beal Photography

After what has felt like weeks of making made to order bangles and findings, deleting items sold on one site from the other two sites they are also listed on, packing orders and printing postage labels, walking to the post box, and dealing with queries, the Christmas rush is now over..... or at least it will be when I get one last bangle made and in the post by the end of today. This has been my best Christmas selling-wise so far. My copper and silver bangles have been a big hit so I'm so glad I had a go at making a bangle in jewellery class last year when I didn't know what else to make!

Now it's just the pre-Christmas induced twitchiness of "can you tell me when my order will arrive?" type of queries to deal with. I've had three so far and after reassuring the buyers that their item should turn up soon and asking them to be patient (nicely) two have turned up and the other (in France) hasn't got back to me since so hopefully the item has arrived.
 I understand the buyers' anxiousness completely and try to put myself in their shoes when replying to their messages. Buying from a small independant online seller can be a risk at times but the majority are hard-working, honest people who are over-joyed to share their creations with their buyers. I know I am.

To mark the start of getting back to doing "normal" things instead of having my head full of all things jewellery, I went out with friends yesterday for Christmas lunch. We went to a buffet style Pan Asian place called Cosmo in Eastbourne. It's very popular and you can eat as much as you like. We did take full advantage of that and began with some starters like battered prawns, sesame toast and satay chicken. Then we hit the hard stuff and went for beef in black bean sauce, chicken with cashew nuts, Thai-style pork, egg fried rice and lots of noodles. I finished with a slice of chocolate cake.  They also had a chocolate fountain! I was in heaven and had to restrain myself from putting my head in it a la Dawn French in The Vicar of Dibley! I did try a couple of marshmallows dipped in it though. Delicious. The diet starts in the new year...... :D


Thursday, 28 November 2013

Silver And Copper Bangles With Coils


My continuing love for making bangles now includes bangles with added coils. It's one of the things I attempted with the very first bangle I made a few months ago....


I tried to solder the coils using paste solder on this one as I thought it would be easier but it just didn't work - the paste solder just burnt and formed a lump and refused to flow so I went back to using strip solder. That worked better but positioning the tiny pallions was a bit tricky "back then" and I ended up with a bangle a little bit out of round.

Since then I've learned to pick solder which makes life so much easier! Pick soldering is basically melting the solder into a ball which will then stick to your soldering pick meaning you can position it in tricky spots more easily. Once your metal is up to the correct temperature you place the ball of solder on the join and it flows immediately (in theory!) It doesn't always flow immediately but it will stay in place and is a much quicker way to solder than positioning small pieces of strip solder on an awkward join then watching them slide off as the flux bubbles. I use this method to solder all my bangle joins and to solder on the coils on my new bangles.


 The oxidized sterling silver version three of which I am (yes I really am) going to make for myself "soon" and a copper and silver version...


Excitement Alert!!
I'm very pleased to announce I am now the proud owner of a rolling mill. Yes! I have one at last and it's a Durston! Ever since I discovered rolling mills and what you could do with them I have coveted one but a look at the prices soon changed my mind and I made do with other ways of texturing my metal. I have been using the rolling mill at the night class I go to but the rollers aren't properly aligned so you only get half a texture most of the time. I did ask the teacher if it could be sorted but apparently they can't fix it so that kind of pushed me into thinking about getting my own rolling mill.

It was then a case of arguing with myself over whether to get one of the cheaper versions or to splurge and go for a Durston. I didn't want to get a cheaper one and regret it but the Durstons are so expensive and I didn't know where I was going to put it when I was using it or where it would go when I wasn't. Not having a workroom or bench causes problems like this! I don't have anywhere to fix it permanently but decided to worry about that when it arrived. So I went for a Durston in the end as a reward for not smoking for over a year now. I'm slightly embarrassed to admit I smoked in the first place to be honest as it's such a stupid thing to do but I've stopped and I feel so much better for it plus I've saved myself over £2,500 that would have gone on fags in the last year or so. So spending nearly £400 on a rolling mill was sweetened a little by that thought at least.

Here it is - I solved the fixing it in position problem by using two G-clamps and attaching it to the worktop in the kitchen. That really is the only place I can use it but it's very sturdily fixed and quite safe to use. I need to open the cupboard door to attach the clamps but I didn't think you would want to see the contents of my cupboard :D


It works wonderfully evenly and I've tried out a couple of leaf skeletons on copper and silver which came out really well. I know it's going to get a lot of use and I am thinking of selling textured copper discs in the future too.
As for somewhere to keep it when I'm not using it or gazing at it lovingly... I have acquired part of another cupboard in the sideboard. Me and my jewellery making equipment are slowly taking over.........