Thursday, 16 January 2014

Combining Soldering And Enamel


The need to make cute, brightly coloured enamel studs propelled me into the world of combining soldering with enamel a couple of years ago. I knew from reading up on it that it was possible to enamel and solder on the same piece but wasn't too confident I was able to do it back then.

It was a slightly embarrassing occurance that made me just get on with - I'd made some enamel studs with glued on stud posts. I'd used 2 part epoxy resin which was a job in itself as it set hard after 5 minutes so I had to keep mixing more up. The finished studs looked ok but that little voice in my head kept asking "are you sure you want to use glue?" I wasn't but didn't think I had any other way to do it so I used glue. I sold my first pair and merrily sent them on their way to Canada. A couple of week later the buyer got in touch to say the stud post had come off one of the earrings and the other was hanging off. I was mortified, apologized profusely and refunded her money immediately. Luckily she was understanding about it but I felt awful! I hadn't packed the studs well enough in the first place to withstand a trip to New Brunswick but it was the glue spectre that was haunting me the most.

I decided then I had to teach myself to solder posts onto stud earrings and to learn to combine soldering and enamel. My first attempts weren't great and involved the melting of a few stud posts, lots of sweating due to concentrating so hard and some swearing. I tried enamelling just one side of a disc and then soldering the post on last but that didn't work for me, I just ruined the enamel with the heat from the torch. I almost gave up on it but I hate to admit defeat and I got there eventually using enamel solder also called IT solder. Enamel solder flows at a higher temperature than enamel (and hard solder) so it can be used before enamelling and won't reflow when the enamel is fired.

I have used it to torch fire small enamel stud earrings with great success. The two fears I had before I did it the first time - will the solder react with the enamel (or vice versa) and mess it up and will I melt the sterling post when I'm firing the front of the earrings didn't happen and I've gone on to make several pairs to date. The latest were three pairs of enamel heart studs I made last week.


I took photos as I was soldering and enamelling the heart studs which I hope might be useful!


1. First I flowed some enamel solder onto the pad of the stud fitting. I prefer to use these as my hand isn't steady enough to hold a post and solder it in place and the pads mean you can sit the fitting onto the back of the earring and it will stay put as you solder. I made holes in my solder block for the pad and post to sit in to keep them level.
2. Copper hearts just out of the pickle ready for soldering.


3.The first four soldered together
4. In the pickle to clean (dirty pickle!)


5. Counter enamel sifted onto the back of one of the studs and placed on the trivet ready for torch firing. You can see the trivet is sat precariously near the edge of my soldering block (which is sat on top of an empty tin can) so that I could get the torch under it. I've since bought a tripod and wire mesh to sit the trivet on which will make it much easier to get right underneath with the torch.
6. The counter enamel finished on all six earrings. I fired it to roughly orange peel stage as it will be in direct contact with the flame when the front is fired and will smooth out nicely then.


7. Enamel sifted onto the front. I always balance/hold the copper piece in my fingers when I sift the enamel as I find it easier but flat pieces can be set onto bottle tops if preferred.
8. Not the best photo but hopefully you can see the stud set onto the trivet with the post sitting in the gap at the centre. The small gap where the three legs meet is very handy for this and helps protect the silver post from the heat of the torch. I place it there by gripping the top of the post with tweezers right underneath the earring and carefully setting it in the centre of the trivet so the post fits in the gap. 


9. The first two pairs after the first coat, just to orange peel stage again. I make sure to keep the torch moving in small circles to avoid concentrating the heat in one spot for too long.
10. Another layer and a sprinkle of transparent on top and they are finished! Some people enamel just the front and solder a post to the back with easy solder to finish. It seems to work for them but I found it either ruined the enamel or the enamel cracked so I prefer to do it the hard (right?!) way!


Sunday, 5 January 2014

Some New Copper Earrings And A Sale


One of my New Year things was to start using up my rather large collection of cabs, including some cab shaped pearl beads I've had for years. So I made a start with these copper earrings.

I rolled the copper through my rolling mill with a textured card to give it a lovely swirly pattern and combined the copper with pale pink pearl beads and a fine silver ball. The balls were a total pig to solder on as they kept wriggling around and refusing to solder on the flat side. I have no idea why they were doing this but after a bit of a battle I did get them soldered down in the end!


The second pair I made used part of some really lovely sterling silver bracelet toggle fasteners. I remember buying these on ebay several years ago after ebay sent me a voucher. I can't remember why they sent me a voucher other than I was a seller on there at the time. Anyway I bought the flower toggle fasteners as I used to make strung bracelets at the time but never used them all so when I had a tidy up last week I thought they were too pretty to ignore.

I cut the connecting ring off them and soldered them to textured copper then pierced out the copper sheet in the centre and trimmed the copper around the outside to echo the flower shape, added a hanging loop and earwires and oxidized. I think they're a bit unusual looking and I'm liking the negative space thing going on!


If you visit my Etsy shop today you'll see I'm having a 10% off sale! That's on everything including findings. Use the coupon code "ooh lovely" to get 10% off anything you buy from 6 January to the 6 February.

I enjoyed a bit of a break over Christmas but am now back to it with jewellery and findings orders again! I'm hoping to get some time to make more new pieces in the next couple of weeks including heart - themed pieces for Valentines.
Till next time.......

Wednesday, 1 January 2014

Lists, The New Year And Things I Really Like

Fireworks

Photo : Nigel Howe on Flickr

Firstly, Happy New Year to everyone!! I hope 2014 proves to be a good year.

Like everyone else, the end of the year makes me think about what I've done over the past year and what I want to do in the new year. It's also a time I makes lists. I make lists all the time as they make me feel organized but the start of a new year is the time for lists. I currently have two lists on the go: a "to buy" list......


and a jewellery "to do in 2014" list....


Click on the photos if you really want to see what I've written!
I've made a good start on the "to buy" list and I'm now waiting for lots of nice packages to arrive through the post. One thing I have come to realize over the past year is that I have developed a bit of a thing for stamps. My stamp colection now has it's own box to live in. I started buying them to use for etching copper and have also started using them to decorate my jewellery packaging. I use flower stamps and a "thank you" stamp on a tag I attach to gift wrapped jewellery and I also started using them to prettify the PIP boxes I use for posting jewellery in the UK. The boxes are brown and a bit boring so I now stamp them on the back and inside with various designs. They look a bit more interesting now!

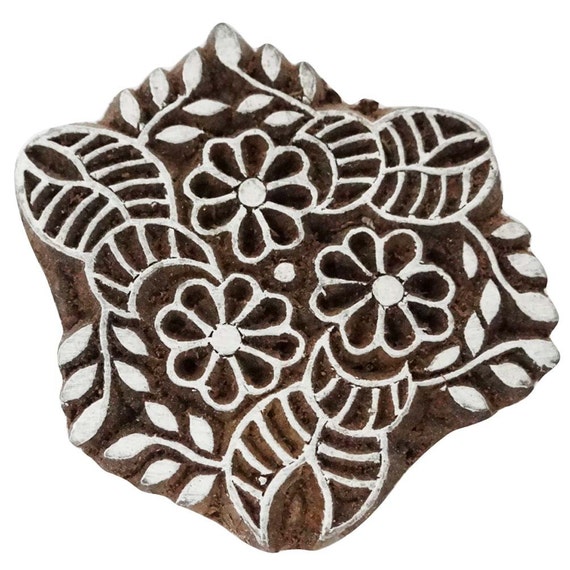
When I was browsing recently for "stuff" I came across a lovely craft website called Sticky Tiger. It's a really nice looking site and you can find a large variety of craftiness there such as stamps (really?!), haberdashery, jewellery making things, papercraft and packaging. Their selection of stamps is a bit different from the norm and there are some at very reasonable prices.I bought a few new ones just after Christmas which arrived last Saturday (28th Dec). I also found a couple of sites that sell Indian wooden carved stamps similar to this one from Etsy shop Indian Beautiful Art.


I bought a few of those too from Rainbow Silks......well they were only £2.50 each! I'm hoping they will work well with Stayz On ink for etching copper.

I have lots of ideas for new jewellery in 2014 (see list!) Since I started making jewellery "properly" I've become a bit of a multi-tasking fiend. I can't bear to have nothing to do and often have three things on the go at once. I never got round to making anymore enamel cabochons so that's something I must do plus start using up the stone cabs I have. My handmade findings need an overhaul and those that don't sell well retired and new designs added. I'm already thinking about Valentine's Day and things to make with hearts. My strange new love of sawing and piercing also continues (strange because I used to hate it!) so some pierced design pendants will probably appear at some point during the year.
I also have my rolling mill to play with and a bit of tidying and sorting out to do so from where I'm standing I think 2014 is going to keep me very busy one way or the other!

Monday, 23 December 2013

Christmas Wishes!

MERRY CHRISTMAS


Now that the madness associated with selling online at Christmas has gently drawn to a close... but not after two last minute make-them-and-get-them-in-the-post-today bangles I wanted to say a big Christmas thank you! to everyone of my customers this year. It's been a great year for selling and despite sometimes just wanting to stop making findings/earrings/bangles and the packaging I also make for them to go in, and just go and veg out in front of the TV, I really have enjoyed every minute of it!

I also wanted to wish everyone who reads and comments on this blog and those who have emailed me to ask questions or just for a chat about making jewellery a very Merry Christmas and thank you for making it feel like it's worth it. 
••••

Wednesday, 18 December 2013

And Relax...........

Cat Nap

photo courtesy of Andy Beal Photography

After what has felt like weeks of making made to order bangles and findings, deleting items sold on one site from the other two sites they are also listed on, packing orders and printing postage labels, walking to the post box, and dealing with queries, the Christmas rush is now over..... or at least it will be when I get one last bangle made and in the post by the end of today. This has been my best Christmas selling-wise so far. My copper and silver bangles have been a big hit so I'm so glad I had a go at making a bangle in jewellery class last year when I didn't know what else to make!

Now it's just the pre-Christmas induced twitchiness of "can you tell me when my order will arrive?" type of queries to deal with. I've had three so far and after reassuring the buyers that their item should turn up soon and asking them to be patient (nicely) two have turned up and the other (in France) hasn't got back to me since so hopefully the item has arrived.
 I understand the buyers' anxiousness completely and try to put myself in their shoes when replying to their messages. Buying from a small independant online seller can be a risk at times but the majority are hard-working, honest people who are over-joyed to share their creations with their buyers. I know I am.

To mark the start of getting back to doing "normal" things instead of having my head full of all things jewellery, I went out with friends yesterday for Christmas lunch. We went to a buffet style Pan Asian place called Cosmo in Eastbourne. It's very popular and you can eat as much as you like. We did take full advantage of that and began with some starters like battered prawns, sesame toast and satay chicken. Then we hit the hard stuff and went for beef in black bean sauce, chicken with cashew nuts, Thai-style pork, egg fried rice and lots of noodles. I finished with a slice of chocolate cake.  They also had a chocolate fountain! I was in heaven and had to restrain myself from putting my head in it a la Dawn French in The Vicar of Dibley! I did try a couple of marshmallows dipped in it though. Delicious. The diet starts in the new year...... :D


Thursday, 12 December 2013

Cuttlebone Cast Silver Pendant


I mentioned a while ago that I'd been doing some cuttlebone casting at my jewellery night class and that I would post about it. Well this is the pendant I made from the cast silver. You wouldn't know it was cast from a cuttlefish bone really but I did learn several things by making it including what not to do when tube setting!

I took some scrap silver in to college to use for the casting rather than pay for casting grains and made my mould in the cuttlebone. I went for a simple rectangle shape just to keep it simple rather than try to create a more intricate design that possibly wouldn't work. My first mistake was to use all the scrap silver I'd taken in - all 35g of it! It took forever to melt in the crucible and at one point there were two of us with two torches going at it. I actually gave up at one point then realized that the silver was stuck in the crucible so I'd have to carry on and get it flowing. Eventually (after about 20 mins) the silver scrap started to melt and it could be poured into the cuttlebone mould. Part of the cuttlebone snapped off at the bottom as it was too thin but I did end up with this....


 It was thicker than I hoped but what a lovely texture! I wanted to thin it down a bit as I was hoping to sell whatever I made and didn't want it to be over 7.78g otherwise I would need to get it hallmarked so I took the thing with the beautiful texture and flattened it in the rolling mill!

I then cut a shield shape out of it and added a partial heart cut out at the side. I soldered on a bail and a silver ball. The silver ball took three attempts - the first time I soldered it to the back of the bail by mistake, the second there wasn't enough solder and it came off so I did it again at home. I usually need to sort out things at home as soldering in class always seems to go wrong for some reason.
In the meantime we were shown how to tube set so I thought I'd add a tube set faceted gemstone to the pendant. My first attempt didn't go too well. I forgot about the culet (the pointy bit at the bottom of the gemstone) and cut my tube too short! So when I set it the culet touched the pendant and the gemstone skewed over to the side slightly. I also used a setting punch which was too big and left a lovely ring stamped around the base of the tube on the pendant. I'd been so engrossed in looking at the gemstone when I was setting it I didn't even notice the stamped ring. So after swearing quite a bit and sanding out the stamped ring this is what it looked like after I'd oxidized it.....


You can see in this photo how the gemstone isn't level. I finished it but wasn't really happy but when I took it into class everyone said it looked ok and you couldn't see it wasn't completely level. I was sort of reassured but as I wanted to sell it and knowing it wasn't "right" I decided to sort it out and start again. So here it is with the stone and tube setting removed, cleaned up and new tube setting soldered on...


Putting it through the rolling mill did flatten the texture a lot but it still has some texture plus I was able to sand the bottom part smoother making it easier to solder the tube setting onto it. I finished it by setting a stabilized turquoise cab into the tube setting and oxidizing it.


I was quite glad to see it finished to be honest! I seemed to spend weeks working on it. I listed it in my Etsy shop and it sold earlier this week and is now on it's way to California. 

Goodbye my first cast and tube set pendant, you drove me completely nuts but thank you for teaching me what not to do :D


Wednesday, 4 December 2013

Rolling Mill Textures - Leaf Skeletons


Last time I blogged about the Durston rolling mill I'd just bought. I love it. I haven't had a chance to really have a play with it yet thanks to being busy with orders (which is a good thing!) But I hope to have a good old go on it soon. I received some textured cards today from Rolling Mill Resource, a wonderful shop on Etsy. The cards are specially textured for use with a rolling mill or metal clay and are available in lots of cool designs and sizes. Here's one of the designs I choose.....

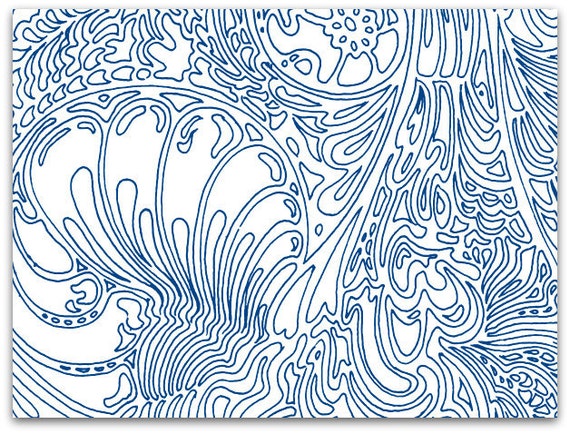
G611 Rolling Mill (Paisley Outline) 4"x5" Low Relief Pattern

I was really pleased to see that the shop owner Tracey Perseverance Johnson had included a couple of extra patterns too which was very kind of her. So I'm slowly collecting textures to try with the rolling mill. I have some brass texture plates and some very fine netting (it's probably got a proper name but I'm no seamstress so haven't got a clue!) I also have a couple of embossing folders that you use to add raised texture and patterns to paper and card. They are made of sturdy plastic and if I can cut them so they fit the width of my rollers I'll have a go with those too. I'm also interested to see what twisted wire looks like when flattened. So I think I'm going to enjoy experimenting with my favourite piece of machinery :D

I did try some copper and sterling silver with the leaf skeletons I've had for a while and here's what I made with the results...


A pair of simple studs in oxidized finish. I love these and must make myself a pair! I also made a pair in a bright silver finish too. 


Copper leaf earrings with tube set stabilized turquoise and fine silver balls. I'm still finding tube setting a challenge as I think I'm a bit gung-ho with the grinding of the seat and struggle a bit to get the stone to fit sometimes without a lot of trying the fit and re-doing the grinding bit then making a mess and having to start again! I was the same with cabochon setting at first but I got there in the end. Tube setting is supposed to be "easy" according to some people. One day I will be one of those people  :D


A sterling silver leaf pendant with tube set moonstone. I love moonstone. It goes really well with oxidized silver and this tube setting was easy to do compared to the copper earrings which gave me a false sense of security.....but not for long!

 I will post more on rolling mill textures as soon as I get a chance.