Monday, 23 December 2013

Christmas Wishes!

MERRY CHRISTMAS


Now that the madness associated with selling online at Christmas has gently drawn to a close... but not after two last minute make-them-and-get-them-in-the-post-today bangles I wanted to say a big Christmas thank you! to everyone of my customers this year. It's been a great year for selling and despite sometimes just wanting to stop making findings/earrings/bangles and the packaging I also make for them to go in, and just go and veg out in front of the TV, I really have enjoyed every minute of it!

I also wanted to wish everyone who reads and comments on this blog and those who have emailed me to ask questions or just for a chat about making jewellery a very Merry Christmas and thank you for making it feel like it's worth it. 
••••

Wednesday, 18 December 2013

And Relax...........

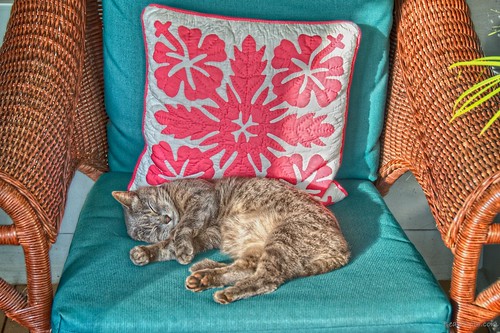
Cat Nap

photo courtesy of Andy Beal Photography

After what has felt like weeks of making made to order bangles and findings, deleting items sold on one site from the other two sites they are also listed on, packing orders and printing postage labels, walking to the post box, and dealing with queries, the Christmas rush is now over..... or at least it will be when I get one last bangle made and in the post by the end of today. This has been my best Christmas selling-wise so far. My copper and silver bangles have been a big hit so I'm so glad I had a go at making a bangle in jewellery class last year when I didn't know what else to make!

Now it's just the pre-Christmas induced twitchiness of "can you tell me when my order will arrive?" type of queries to deal with. I've had three so far and after reassuring the buyers that their item should turn up soon and asking them to be patient (nicely) two have turned up and the other (in France) hasn't got back to me since so hopefully the item has arrived.
 I understand the buyers' anxiousness completely and try to put myself in their shoes when replying to their messages. Buying from a small independant online seller can be a risk at times but the majority are hard-working, honest people who are over-joyed to share their creations with their buyers. I know I am.

To mark the start of getting back to doing "normal" things instead of having my head full of all things jewellery, I went out with friends yesterday for Christmas lunch. We went to a buffet style Pan Asian place called Cosmo in Eastbourne. It's very popular and you can eat as much as you like. We did take full advantage of that and began with some starters like battered prawns, sesame toast and satay chicken. Then we hit the hard stuff and went for beef in black bean sauce, chicken with cashew nuts, Thai-style pork, egg fried rice and lots of noodles. I finished with a slice of chocolate cake.  They also had a chocolate fountain! I was in heaven and had to restrain myself from putting my head in it a la Dawn French in The Vicar of Dibley! I did try a couple of marshmallows dipped in it though. Delicious. The diet starts in the new year...... :D


Thursday, 12 December 2013

Cuttlebone Cast Silver Pendant


I mentioned a while ago that I'd been doing some cuttlebone casting at my jewellery night class and that I would post about it. Well this is the pendant I made from the cast silver. You wouldn't know it was cast from a cuttlefish bone really but I did learn several things by making it including what not to do when tube setting!

I took some scrap silver in to college to use for the casting rather than pay for casting grains and made my mould in the cuttlebone. I went for a simple rectangle shape just to keep it simple rather than try to create a more intricate design that possibly wouldn't work. My first mistake was to use all the scrap silver I'd taken in - all 35g of it! It took forever to melt in the crucible and at one point there were two of us with two torches going at it. I actually gave up at one point then realized that the silver was stuck in the crucible so I'd have to carry on and get it flowing. Eventually (after about 20 mins) the silver scrap started to melt and it could be poured into the cuttlebone mould. Part of the cuttlebone snapped off at the bottom as it was too thin but I did end up with this....


 It was thicker than I hoped but what a lovely texture! I wanted to thin it down a bit as I was hoping to sell whatever I made and didn't want it to be over 7.78g otherwise I would need to get it hallmarked so I took the thing with the beautiful texture and flattened it in the rolling mill!

I then cut a shield shape out of it and added a partial heart cut out at the side. I soldered on a bail and a silver ball. The silver ball took three attempts - the first time I soldered it to the back of the bail by mistake, the second there wasn't enough solder and it came off so I did it again at home. I usually need to sort out things at home as soldering in class always seems to go wrong for some reason.
In the meantime we were shown how to tube set so I thought I'd add a tube set faceted gemstone to the pendant. My first attempt didn't go too well. I forgot about the culet (the pointy bit at the bottom of the gemstone) and cut my tube too short! So when I set it the culet touched the pendant and the gemstone skewed over to the side slightly. I also used a setting punch which was too big and left a lovely ring stamped around the base of the tube on the pendant. I'd been so engrossed in looking at the gemstone when I was setting it I didn't even notice the stamped ring. So after swearing quite a bit and sanding out the stamped ring this is what it looked like after I'd oxidized it.....


You can see in this photo how the gemstone isn't level. I finished it but wasn't really happy but when I took it into class everyone said it looked ok and you couldn't see it wasn't completely level. I was sort of reassured but as I wanted to sell it and knowing it wasn't "right" I decided to sort it out and start again. So here it is with the stone and tube setting removed, cleaned up and new tube setting soldered on...


Putting it through the rolling mill did flatten the texture a lot but it still has some texture plus I was able to sand the bottom part smoother making it easier to solder the tube setting onto it. I finished it by setting a stabilized turquoise cab into the tube setting and oxidizing it.


I was quite glad to see it finished to be honest! I seemed to spend weeks working on it. I listed it in my Etsy shop and it sold earlier this week and is now on it's way to California. 

Goodbye my first cast and tube set pendant, you drove me completely nuts but thank you for teaching me what not to do :D


Wednesday, 4 December 2013

Rolling Mill Textures - Leaf Skeletons


Last time I blogged about the Durston rolling mill I'd just bought. I love it. I haven't had a chance to really have a play with it yet thanks to being busy with orders (which is a good thing!) But I hope to have a good old go on it soon. I received some textured cards today from Rolling Mill Resource, a wonderful shop on Etsy. The cards are specially textured for use with a rolling mill or metal clay and are available in lots of cool designs and sizes. Here's one of the designs I choose.....

G611 Rolling Mill (Paisley Outline) 4"x5" Low Relief Pattern

I was really pleased to see that the shop owner Tracey Perseverance Johnson had included a couple of extra patterns too which was very kind of her. So I'm slowly collecting textures to try with the rolling mill. I have some brass texture plates and some very fine netting (it's probably got a proper name but I'm no seamstress so haven't got a clue!) I also have a couple of embossing folders that you use to add raised texture and patterns to paper and card. They are made of sturdy plastic and if I can cut them so they fit the width of my rollers I'll have a go with those too. I'm also interested to see what twisted wire looks like when flattened. So I think I'm going to enjoy experimenting with my favourite piece of machinery :D

I did try some copper and sterling silver with the leaf skeletons I've had for a while and here's what I made with the results...


A pair of simple studs in oxidized finish. I love these and must make myself a pair! I also made a pair in a bright silver finish too. 


Copper leaf earrings with tube set stabilized turquoise and fine silver balls. I'm still finding tube setting a challenge as I think I'm a bit gung-ho with the grinding of the seat and struggle a bit to get the stone to fit sometimes without a lot of trying the fit and re-doing the grinding bit then making a mess and having to start again! I was the same with cabochon setting at first but I got there in the end. Tube setting is supposed to be "easy" according to some people. One day I will be one of those people  :D


A sterling silver leaf pendant with tube set moonstone. I love moonstone. It goes really well with oxidized silver and this tube setting was easy to do compared to the copper earrings which gave me a false sense of security.....but not for long!

 I will post more on rolling mill textures as soon as I get a chance.

Thursday, 28 November 2013

Silver And Copper Bangles With Coils


My continuing love for making bangles now includes bangles with added coils. It's one of the things I attempted with the very first bangle I made a few months ago....


I tried to solder the coils using paste solder on this one as I thought it would be easier but it just didn't work - the paste solder just burnt and formed a lump and refused to flow so I went back to using strip solder. That worked better but positioning the tiny pallions was a bit tricky "back then" and I ended up with a bangle a little bit out of round.

Since then I've learned to pick solder which makes life so much easier! Pick soldering is basically melting the solder into a ball which will then stick to your soldering pick meaning you can position it in tricky spots more easily. Once your metal is up to the correct temperature you place the ball of solder on the join and it flows immediately (in theory!) It doesn't always flow immediately but it will stay in place and is a much quicker way to solder than positioning small pieces of strip solder on an awkward join then watching them slide off as the flux bubbles. I use this method to solder all my bangle joins and to solder on the coils on my new bangles.


 The oxidized sterling silver version three of which I am (yes I really am) going to make for myself "soon" and a copper and silver version...


Excitement Alert!!
I'm very pleased to announce I am now the proud owner of a rolling mill. Yes! I have one at last and it's a Durston! Ever since I discovered rolling mills and what you could do with them I have coveted one but a look at the prices soon changed my mind and I made do with other ways of texturing my metal. I have been using the rolling mill at the night class I go to but the rollers aren't properly aligned so you only get half a texture most of the time. I did ask the teacher if it could be sorted but apparently they can't fix it so that kind of pushed me into thinking about getting my own rolling mill.

It was then a case of arguing with myself over whether to get one of the cheaper versions or to splurge and go for a Durston. I didn't want to get a cheaper one and regret it but the Durstons are so expensive and I didn't know where I was going to put it when I was using it or where it would go when I wasn't. Not having a workroom or bench causes problems like this! I don't have anywhere to fix it permanently but decided to worry about that when it arrived. So I went for a Durston in the end as a reward for not smoking for over a year now. I'm slightly embarrassed to admit I smoked in the first place to be honest as it's such a stupid thing to do but I've stopped and I feel so much better for it plus I've saved myself over £2,500 that would have gone on fags in the last year or so. So spending nearly £400 on a rolling mill was sweetened a little by that thought at least.

Here it is - I solved the fixing it in position problem by using two G-clamps and attaching it to the worktop in the kitchen. That really is the only place I can use it but it's very sturdily fixed and quite safe to use. I need to open the cupboard door to attach the clamps but I didn't think you would want to see the contents of my cupboard :D


It works wonderfully evenly and I've tried out a couple of leaf skeletons on copper and silver which came out really well. I know it's going to get a lot of use and I am thinking of selling textured copper discs in the future too.
As for somewhere to keep it when I'm not using it or gazing at it lovingly... I have acquired part of another cupboard in the sideboard. Me and my jewellery making equipment are slowly taking over.........
Monday, 25 November 2013

Creative Cities Blog Feature


I am currently featured on Rosie and the Boys, a blog by Rosie about creative crafts. Rosie is a papercut artist, professional florist and independant designer/maker who writes about her life and her creative interests. The blog is really interesting and varied and includes a section called "creative cities", where a different town/city and it's handmade community is featured for a week which is where my jewellery business came in. Rose decided to feature Eastbourne in East Sussex and found my shop on Etsy. She sent me some questions and you can read my answers in her latest post - Jewel of the South - An Interview With Cinnamon Jewellery.
Eastbourne and it's crafting community is being featured all week so if you are interested check back to Rosie's blog every day this week!

Sunday, 17 November 2013

Wire Wrapped Hoop Earrings in Silver and Copper


Circles are a definite theme in my life. It started when I was old enough to grab a crayon and scribble on a neighbour's wall. My Mum said they always knew when it was me because the circles gave me away. I still love circles and sometimes have to tell myself to NOT make another pair of disc earrings! Hoops are also a favourite and something I come back to often. I finished three pairs of hoop earrings this week, one pair in silver and two in copper.

I started with soldered hoops made with 2mm copper and silver wire and teamed them with some wire wrapping. I love coils of wire especially when it's oxidized and the contrast of dark and polished areas of metal really shows up.


 I normally like to make at least one pair in copper as it's useful for working out how much wire I'm going to need and I always find copper is easier than silver. I don't really know why other than maybe as it's much cheaper I'm not afraid to make a mistake ( I think that probably is the reason!) I actually made two pairs in copper. This pair has 4mm green grass turquoise beads added to the earwires for a bit of colour. The second copper pair has unakite beads threaded onto the earwires which is a beautiful coloured stone - a mix of olive green and brick red and looks fab with oxidized copper.


I then made a silver pair because you just have to..... I added some turquoise jasper beads to the earwires which is a favourite coloured stone of mine. It's a bright sea-green turquoise colour and as I've had the beads for so long I can't remember where I bought them but I think it was maybe Lima Beads.


I really enjoyed making these earrings. I started out making wirework jewellery several years ago with a bit of basic wire wrapping before I moved onto more metalwork type stuff so it was nice to do something relatively easy.
I went a bit coil-tastic this week and have also made a silver and copper bangle both with soldered coil decorations. I love the addition of coils to bangles and I'm planning to make myself three silver coil bangles as a belated birthday treat to myself. 

As soon as I have photographed the copper version of the coil bangle (Tuesday is looking good weather-wise) I will write a post about them 

Thursday, 7 November 2013

Etched Copper Pendants with Enamel and Turquoise


I recently finished two copper pendants that had been waiting on the sidelines for quite a time while I finished some other orders. I'd managed to cut them out and file and sand the edges then some findings orders arrived and they were return to the "to do" pile. But at last earlier this week I managed to finish them!

I used a mendhi style stamp I got from Hobbycraft for a £1 with Stayz On ink to stamp the design onto the copper then etched for about an hour. I love these type of detailed designs. My ferric chloride was on it's last legs and took longer than usual - it would normally take about 40-45 mins to get the light etched look that I prefer.
*Tip!* If you're planning to use stamps for etching I've found the fine line designs work and look better than the thicker line ones.
I then sawed around the edge of the design, filed and sanded and made the bails. Strangely enough I have never made a bail like this before. I've made hidden bails and p shaped ones but not the type that solders to both sides of the pendant. I really like the look of it with this type of pendant and you can decorate them anyway you want by hammering, stamping or etching. I soldered the bail on first then the silver ball and the bezel last.


I'd made the pink enamel "cabochon" a while ago and hadn't got round to using it for anything else and the colour looked ok with the oxidized copper so at last it was given a home. I made turquoise version too. I say "turquoise" but the cab isn't real turquoise but some kind of stabilized (what does that mean?) or composite material dyed to look like turquoise. It still looks nice though :D


Making this type of bail has given me ideas for extending the front section to form part of the design on a pendant, maybe using contrasting metals or textures. Definitely an idea for my sketch book for a later date.

I'm currently working on some more enamel pendants with pierced out heart designs that I really enjoyed doing which obviously means someone has taken over my brain. I used to absolutely hate sawing metal and now I actually look forward to doing it. Whoever has taken over my sawing brain still breaks blades though..............

Tuesday, 29 October 2013

A Splash Of Colour And Some Twirly Studs


I've been playing with my enamel colours again and creating my own "blends". It's fun sitting at the table with my different colours and mixing them up to make new ones. Enamels don't really mix to make new colours but you can achieve some really pretty speckly effects. Using the same colour groups work better than mixing colours opposite each other on the colour wheel. I found this out when I mixed some purple and lavender enamels with a bright green hoping I'd get a nice purple/green mix but it just looked grey when it was fired. If you looked closely you could see the individual colours but the overall effect was dull but luckily the beauty of enamelling is you can fix it with another layer (within reason!) What I have learned with mixing colours is if it looks dull in the pot it will still look dull when it's fired........... :D

The hoops above are enamelled in a mix of different greens with some transparent turquoise layered on top on the bottom section.


These were originally a really dull orangey-grey (one of my not so great mixes) so I revived them with some more opaque and transparent oranges and a sprinkling of cream and lighter orange on top. They make me think of marmalade.


This pair were victims of the purple/lavender/green horror mix so I brightened them up with more green opaques and a budgerigar green transparent. I love the effect sprinkling opaque enamel on top of transparent gives you, it reminds me of lichen.

I finished off a few simple stud earrings in copper and silver this week too. I used thin strips of metal and coiled them with round nose pliers like you would make a spiral to form cute twirls. I soldered the ends then after sanding one side flat I soldered them to a base, tidied them up then added posts and oxidized them.


The copper pair remind me of chelsea buns!

Monday, 21 October 2013

Using Beads As Cabochons


I finished these etched silver and green pearl earrings recently and took the opportunity yesterday when the sun came out to take a few photos. I used some of the silver I etched recently using nail art stamps and decided to try bezel setting some pearl beads I've had for absolutely years. Yes I did say beads! I bought the beads years ago from "somewhere" (can't remember). They were described as button pearls and they were shaped kind of like cabochons with a slight dome on one side and a flat base on the other and obviously had holes. Some of them were very flat on one side and very domed on the other which is what gave me the idea to use them as cabs.


This photo of a few of the beads was taken under a day light bulb so the colours are a bit off but they are all lovely icy pastel shades of pink, green, apricot, pale blue, purple and grey which look great contrasted with oxidized copper and silver. I sorted through them and removed the ones whose holes were too high to work but as you can see once they are sanded a bit on the bottom the holes will be low enough for the bezel to cover up giving me a lot of very nice pearls to add to my jewellery. I couldn't believe the price of pearl cabs when I looked so I'm really glad I kept hold of these. The only downside is they aren't all exactly the same size and height like cabs but are near enough for it not to matter. Saying that a lot of the cabs I buy are slightly different sizes and heights too!


I'm really proud of these earrings and think I am slowly getting a bit more adventurous! I am still conquering my fear of soldering on the "fiddly bits" - hanging loops, jump rings, etc. I soldered the loops on this pair before I soldered on the bezels to make life easier. My max flame butane torch did start playing up and wouldn't light again after I turned it off after the first soldering. I'd just filled it too so I have no idea what is wrong with it. I managed with my mini butane torch after swearing at the max flame quite a bit.


••• A Completely Different Subject •••
Am I the only person who watches the Strictly results show on Sunday nights and didn't realize it wasn't live? I started to get a bit suspicious after noticing members of the audience in exactly the same seats wearing exactly the same clothes on both nights and thought it was a bit odd..... also I started to look closely at the celebrity dancers' hair and make up to see if it was a bit different on the Sunday night and they always looked exactly the same as they did on Saturday nights. So I Googled it earlier today and found out the Sunday night shows are recorded after the phone lines are closed and the votes are in on Saturday nights. 
Funny what you think about......... :D


Thursday, 10 October 2013

Etched Silver and Copper Wirework Earrings


I managed to catch up with myself last week after a couple of biggish findings orders recently that kept me busy for two whole days and made a few pairs of earrings. I used some copper and silver I'd etched and ventured into wire work territory that I don't do a lot of these days. Just simple bead loops but it was fun getting my beads out again and choosing colours and the quickness of making them was a nice change!


I bought these czech glass beads a while ago from Lima Beads and I love the colours. They have a large selection of czech beads but I couldn't see the kiwi green colour anymore sadly.

I also used some of the sterling silver sheet I'd etched using nail art stamps. The etched designs are small so I was a bit restricted and kept it pretty simple.....


The shape of this pair with the garnet cabochons reminds me of little handbags (kind of). It's the first pair I've made with garnets and I love the colour combination with the oxidized silver. I put a piece of foil behind the cabs as the silver will continue to oxidize and will eventually go black. The foil keeps the area behind the cabs bright and also reflects the light making the garnets appear even redder.


I am back at night school again for my 2nd year of silver jewellery classes. It's nice as seven of us from last year have come back plus four new people have started. We've been learning to cast using delft clay and cuttlefish bone. I didn't fancy the delft clay method so I had a go at casting some of my scrap silver using the cuttlefish bone method last Tuesday....... more of which I shall blog about soon!

Friday, 4 October 2013

Handmade Bangles - A Version In Sterling Silver


I love making bangles and have so far just made them using copper wire. These, much to my surprise, have proved really popular and I must now be the copper bangle making expert of old Eastbourne town!

I had a recent commission for a cuff bangle which was to be a Father of the bride present. The theme of the wedding was amethyst so the customer wanted two small amethyst cabs set at each end of the copper cuff.


I used 1.5mm gauge copper sheet for the cuff which I textured with a hammer, shaped then set the 4mm amethyst cabs. Making the bezels was fiddly as the cabs are so small and I did keep my fingers crossed slightly when soldering the bezels to the bangle but it worked out fine and my customer was pleased. I now have plans to use more of the 1.5mm sheet to make more bangles.

So of course my mind eventually started wandering and thinking about using sterling silver. I have various gauges of silver wire and did think of using 1.6mm but when I tried it with copper the bangle was a bit too easy to bend out of shape even after work hardening and tumbling so I decided to go for 1.8mm which worked much better and forms a nice slim but sturdy bangle.


I think I will try 2mm wire next time as the weight should still come under 7.78g so I wouldn't need to hallmark the bangles. Strangely I found soldering the thinner gauges of wire much harder than the thicker 2.6mm and 3.25mm copper I'm used to using! There isn't much tension in the wire to hold the join together and I ended up holding the two ends together with my pliers to stop them moving as the wire heated up when I was soldering.
The silver bangles make a lovely jingling sound when you wear them and as it's my birthday soon I think I will treat myself with a set :D