Showing posts with label jewellery techniques. Show all posts

Thursday, 25 September 2014

Creating A Matt Finish On Torch Enamel Jewellery


Being a jewellery maker I love watching jewellery making videos, and especially learning new tricks that I can use on a technique I'm familiar with. A video I watched recently was Further Explorations In Jewelry Enameling: Kiln Fired Liquid Enamel And Sgraffito With Susan Lenart Kazmer. I don't enamel with a kiln but the techniques covered are still relevent for torch enamelling. It's a great video full of new ideas and Susan Lenart Kazmer is a likeable teacher.

One of the techniques covered was giving enamel a matt finish using Etchall etching cream. I've seen how lovely enamel jewellery looks with a matt finish and have always been intrigued with it and have thought of trying it myself in the past. The video showed how easy it was to achieve so I went on the cyber hunt for Etchall cream. I found some on ebay for £34 and another etching cream called Armour Etch. I really wanted the Etchall brand so started Googling it until I found some at a much more sensible price of £15.54 plus £2.95 postage from MDP Supplies.

Yesterday afternoon I decided to have a go........
I dug out some old enamelled bits I'd "tidied" into a plastic bag and forgot about. Some of them are pieces I started then decided for whatever reason {no idea!} to abandon and a couple were colour test pieces for a customer.


I cleaned the enamel by wiping over with kitchen towel to remove any dust or grease then applied the Etchall cream with a brush. I wore latex gloves as the cream will irritate skin.


The Etchall cream has the consistency of yoghurt and needs to be applied thickly and as evenly as possible. I went over any patchy areas with some more of the cream if it was needed.


After 15 minutes I used the brush to remove the etching cream and scraped it back into the pot as it is reusable, although for small pieces it's probably not worth bothering. I washed the rest of the cream off in water and dried the enamelled piece.


The result was a smooth egg-shell texture which I think looks great. It's very tactile and feels like smooth stone to touch.


I applied the cream to one side of this piece so the difference with the normal shiny finish can be compared. This piece had a layer of turquoise transparent over the opaque enamels before it was etched.


The green and pink flowers were half-finished abandoned pieces that had been enamelled with just one coat of opaque enamel so are a bit patchy but the etching cream worked well on them. I like the matt effect on the black enamel too.
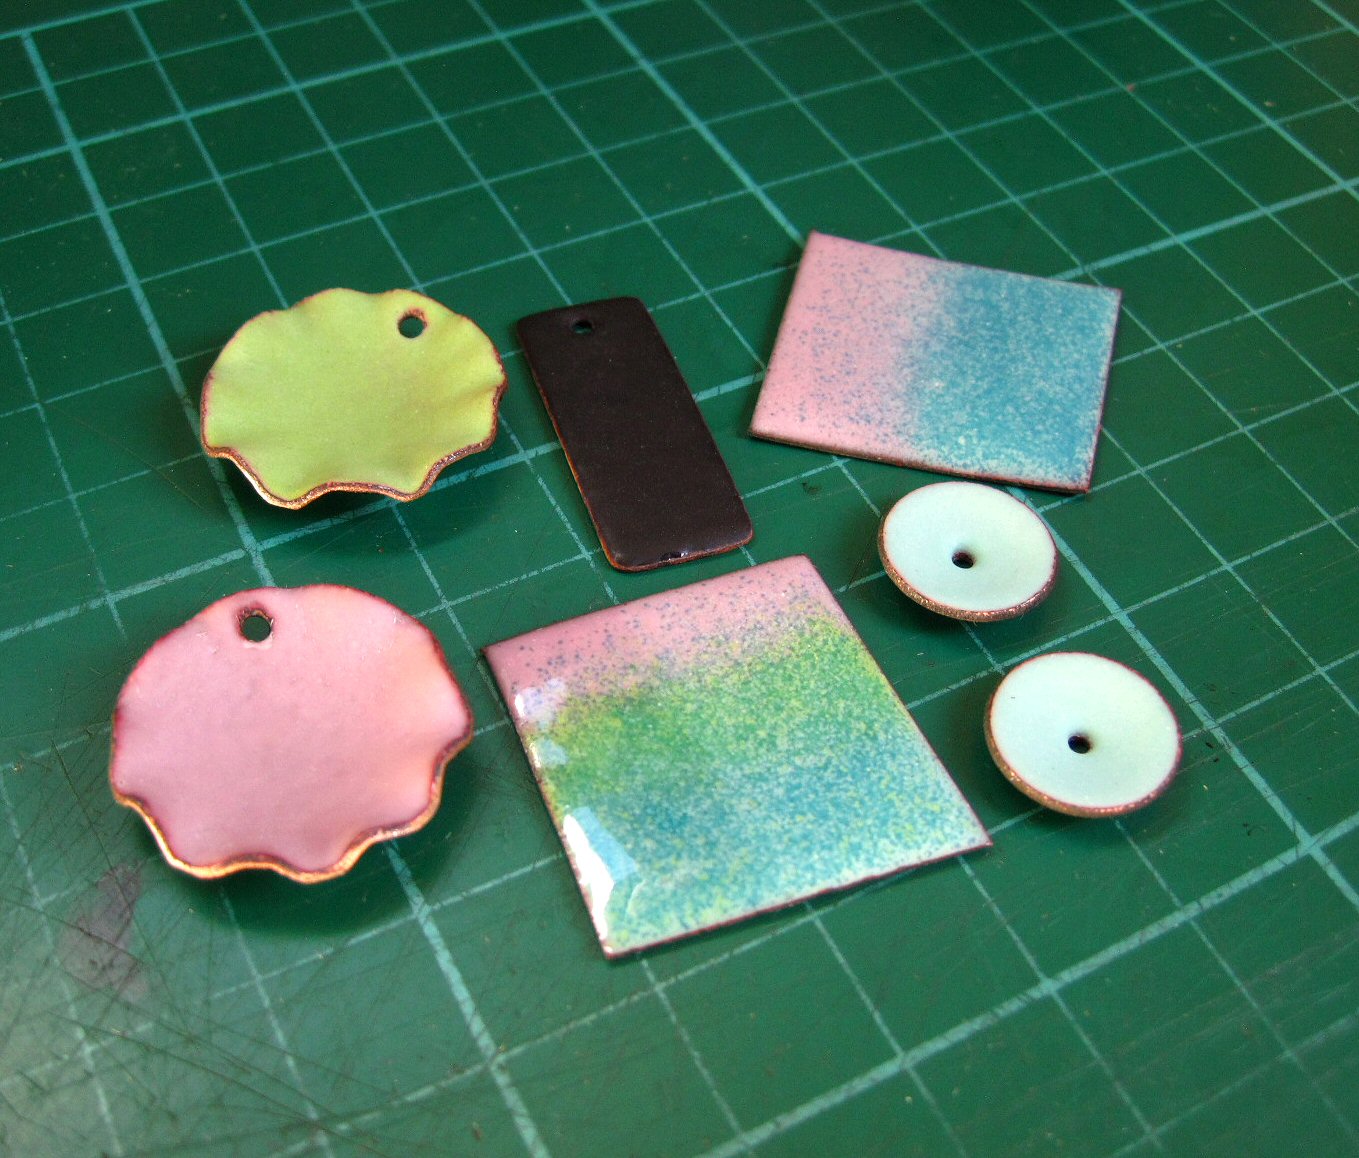

In conclusion, the etching cream is a definite hit with me and something I will be using to give a variation in the finish of my enamel jewellery. It's so quick and easy to use. One of the advantages of using it is there's no light reflection on the matt finish which can be a nuisance when you photograph enamel stuff.
Now I just wish I'd tried it sooner :D


Monday, 29 July 2013

Zentangle Etching On Copper


I've never tried doing Zentangle designs, I don't think I'm good enough at drawing if I'm honest, but I do love Zentangle patterns! A jewellery maker friend of mine recently very kindly sent me two Deborah Read zentangle stamps (thanks Jill!)
I thought I'd use them for etching and decided to try a different way of suspending the copper sheet in the ferric chloride this time too. I normally stick the copper pieces to packing tape and suspend the tape across my etching dish so the copper is immersed in the etching liquid as shown in the photo below.....


This works fine for small pieces but anything larger than about 1.5 inches is too heavy for the tape and pulls it down so it ends up touching the bottom of the dish. It also means the copper pieces start to peel off the tape after about an hour which is not good news if you want to do a deep etch! The answer would be to get a deeper dish and more ferric chloride but I thought I'd try hanging the copper vertically in the etching solution this time.

I started by punching a hole in the top of each piece of copper then covered the back with nail varnish to protect it. You can apply nail varnish to the sides too but as I will be cutting shapes from the etched pieces and not using the whole piece I didn't bother this time. I then applied Stayz On ink to the zentangle stamp when I eventually decided which part of the fabulous crazy heart pattern I wanted to use! I cleaned the front of the copper with wire wool then placed it onto the stamp and pressed firmly.
The photo shows the copper piece on the stamp (with unintentionally colour co-ordinated nail varnish!) and you can see how I managed to get lots of bits of wire wool stuck to the back too :D


The second zentangle stamp inked up before stamping. This one has lots of cool designs to choose from too.


The stamped pieces of copper


Next I needed a plastic container suitable for hanging the copper pieces vertically. I found just what I needed in the kitchen cupboard. It was an old measuring beaker and was just the right size for the amount of ferric chloride I have. I found a couple of sticks outside and armed with some 16g copper wire I attached the stamped copper pieces to the sticks and dangled them in the etching solution. I left them for just over an hour, lifting them up and giving them a wiggle every now and then to remove any etched away copper particles.


I then soaked the copper pieces in water and bicarb, dried them and cleaned the ink off with wire wool. I've noticed this seems to produce fumes which could be a reaction between the etching solution and the steel in the wire wool. It makes me cough sometimes so I'd do it in a ventilated area or outside. I don't know of a quicker way to remove the ink than using wire wool. Heating the metal with a torch would remove it but will probably create fumes too and pickling it doesn't get rid of the ink.


The finished etched pieces partly cleaned up with wire wool. I removed the nail varnish on the back with acetone and washed the copper before pickling it which cleans it thoroughly and helps to stop it tarnishing too quickly.

I found etching this way was much less messy, and there was no fiddling with sticky tape. The only extra step is painting the back with nail varnish and adding the hanging hole. I noticed you don't get the "Jesus ray" effect around the edges of the metal you get with the other method either.

I'm glad I tried etching this way as it's ideal for larger pieces that I was having trouble with previously. I'm going to use the same method next time I etch some silver as silver takes so much longer than copper and I was having problems with it falling off the tape. I'm really glad I didn't throw that measuring beaker away last time I had a kitchen cupboard clear out!