Showing posts with label handmade jewelry. Show all posts
Monday, 18 February 2013
Goodbye Facebook
I decided to deactivate my Facebook account today. I'm hearing a few sharp intakes of breath as some people read this I'm sure. I didn't decide to do it due to any particular problems I've had on Facebook, more cancelled due to lack of interest (on my part).
I opened the account when I opened my Folksy shop as that was what people in the know said you should do when you start a business. And then of course I felt very inadequate because I didn't have hundreds of likers so I joined in the link love thing that was going on at the time and gained quite a few. Great, all these people interested in my jewellery..........except the majority weren't the slightest bit interested in what I make and just did the link love thing in order to gain more likers themselves. Not to be unfair, there were quite a few people who did genuinely like my jewellery and who would comment and like stuff I posted and some have become internet friends and customers which is great.
But what about promoting my business without a Facebook page? Some people have fantastic success using Facebook as a selling tool. Some people. To be honest I've never spent much time on promoting. The majority of followers I had were fellow makers with stuff to sell themselves, not really the target market I should've been aiming for. I do blog which I love and find much more personal and easier to do than Facebook. My shop views from my blog far outweigh my views from Facebook too. I am genuinely baffled when I hear some people claim they spend nearly all day on Facebook. I just cannot imagine what they do on there all day??! What do they do?? Does all that promoting mean they're inundated with sales? Obviously not or else they wouldn't be on Facebook all day. Whenever I used to signed into my Facebook page all I saw was a blur of posts, some I would read and comment/like because they were the one's I really was interested in but most I would just ignore. Ten minutes (maybe) would pass and that would be it, there'd be something else I needed to do so I'd be off. So I suppose I should have hidden lots of posts and just had the one's from people I was interested in show up on my newsfeed. Yes I could've done that but I just didn't care enough to bother (oh dear!) I also wasn't interested in my stats email either and would delete it immediately!
I'm not completely blameless, I didn't really "work" Facebook like I should have but that would've required quite a lot of commitment and time that I prefer to spend on developing my jewellery making skills to make stuff so people can buy it. As someone in the handmade industry I'm aware of the huge number of people on Facebook with lovely things to sell but if I was someone without any links to the handmade world looking to buy a nice bit of handmade jewellery I would Google for it. I wouldn't ever, ever think of going onto Facebook to look for some nice earrings, why would I ? Facebook to most people is a social media site not a shopping site.
I'm not knocking Facebook, it serves a purpose and if I had family/friends in other parts of the world I would use it to keep in touch and post photos. Facebook makes that really easy to do and I may even return one day. Thank you to all of the people who took the time to read and comment or like my posts and to those who posted funny/thought-provoking photos and posts I enjoyed seeing. As for the rest of it, the fake popularity, wasting time promoting your business to people who mostly aren't really interested and most important of all, feeling guilty because I'm not devoting chunks of my time doing it all, I think I'd rather do without it :D
Tuesday, 23 October 2012
Silver Jewellery Class 1st Project - Textured Band Ring
I finished my first project for my jewellery class last week - a textured silver band ring. I've made a few copper and silver rings using wire at home but not from textured silver sheet so it was fun to learn.
The photo shows the ring before soldering - I wasn't convinced the join was tight enough but the teacher was happy with it and it soldered fine. I used some plastic netting with the rolling mill to create the texture. I love the rolling mill! I've ordered some skeleton leaves from ebay to use with it in the future as I love the vein texture you get from them.
After some filing and finishing with wet and dry the ring was ready for polishing. It came out lovely and shiny but then I decided I wanted to oxidize it so the teacher showed everyone how to do that with LOS. She told me to leave it for 24 hours before cleaning it up after oxidizing which puzzled me a bit as I normally clean up my oxidized jewellery straight away. I cleaned it up when I got home that night! A spell in the tumbler and it came out shiny with the textured areas darker from the LOS.
It's a bit scratched up now as I've been wearing it - and yes it did fit the finger I made it for!
This week we're planning a new project - amulets/charms. I've already got a good idea of what I want to make (kind of). We're also going to be shown reticulation, fusing and applying gold foil. I'm a happy bunny :D
Tuesday, 10 July 2012
All Together Now!
After taking up Folksy's offer of their Plus account recently I've decided it makes sense to combine my two Folksy shops and move my handmade findings into my jewellery shop.
So..................after spending rather a long time (let's just say it was most of Saturday) copying and pasting descriptions from one shop to another, my new combined jewellery and findings shop is finished. I even relisted a load of jewellery too to get the front page of my shop looking like a jewellery shop again. I'm liking the Plus account very much!
As for the tediousness of doing it all I know Folksy are working on speeding up the listing process but dear God! At the same time as listing my findings/waiting for pages to load, I managed to a) edit 25 photos, b) use my Bigshot to cut out a load of mini envelopes and c) fold and glue most of said mini envelopes together.
Tuesday, 5 June 2012
Like A Rainbow! New Enamel Pendants
I felt like doing some torch enamelling recently so came up with these colourful pendants using sgraffito and enamel pens.
Sgraffito involves scratching a design into the enamel, either the first layer to reveal the metal beneath or you can fire one colour, sift another contrasting colour on top then scratch out a design or just lines to reveal the first colour layer.
I went for three different colours which involved using pieces of cardboard strategically placed whilst sifting! Fiddly but I love the effect.
I used enamel pens to draw (I use the term loosely!) poppies onto pea green opaque enamel. After firing I added the brown dots to give the flowers a centre.
More enamel pen circles and dots. I don't find enamel pens that easy to use, they can be a bit blobby and having to hold them perpendicular and squeeze quite hard at the same time is not condusive to drawing pretty designs! Circles and dots are fine though! I will be experimenting further and making some earrings in ....... ..... circle and dot designs too :D
Wednesday, 28 March 2012
I've Got A Bit Of A Thing Going On
A disc "thing" that is. The last few pairs of earrings I've made all feature discs in copper or enamel, with or without beads and with a central "dot".
I'm always looking for ways to attach "things" to other "things" when I make jewellery - I think it makes things more interesting. You can do it with rivets, soldering (still learning!) or with wire.
I fancied trying it with wire which is probably the easiest of the three and came up with these designs...
copper and green impression jasper
enamel and copper
enamel and sterling silver
I'm planning on making more of these with enamelled flowers instead of discs because I think they're quite sweet :D
•• Fold Forming ••
I felt like a bit of metal bashing the other day so decided on some very basic fold forming - annealing metal to soften it then creating a bend which you then flatten with a mallet or hammer, anneal again and open up to reveal a "fold" across the metal. I decided to enamel it too and came up with these colourful oval earrings...
The fold is quite tight as I hammered it pretty flat then stamped lines on it once it was opened out. Enamelling it was a bit fiddly but I love the definite division it creates. I think they look a bit like Easter eggs :D
Wednesday, 23 November 2011
New Earrings
I've got that mellow relaxed feeling at the moment, knowing I've got the next two days off work. But it does mean I'm working this weekend though........
My plans for tomorrow (Weds) are to make a start on a project for Bead magazine that needs to be in by December. I know what I'm doing it's just taking the step-by-step photos and the weather issue! It's meant to be a bright day tomorrow so it should be full steam ahead (camera battery on charge as I write!)
I managed to get all of my new earrings photographed last week which is always a relief. Here's some of them.......
I had fun stamping these copper discs even though I have to do it on my knees on the kitchen floor! The table I work on isn't sturdy enough and you end up with a shadow when you try and stamp on it so everything gets moved to the kitchen ~ hammer, bench block, copper, stamps...... plus at least one cat wondering what the hell I'm doing!
My plans for tomorrow (Weds) are to make a start on a project for Bead magazine that needs to be in by December. I know what I'm doing it's just taking the step-by-step photos and the weather issue! It's meant to be a bright day tomorrow so it should be full steam ahead (camera battery on charge as I write!)
I managed to get all of my new earrings photographed last week which is always a relief. Here's some of them.......
These green enamel ovals have been hanging around for a while then I suddenly thought those pretty pink and green czech glass nuggets might go ok with them!
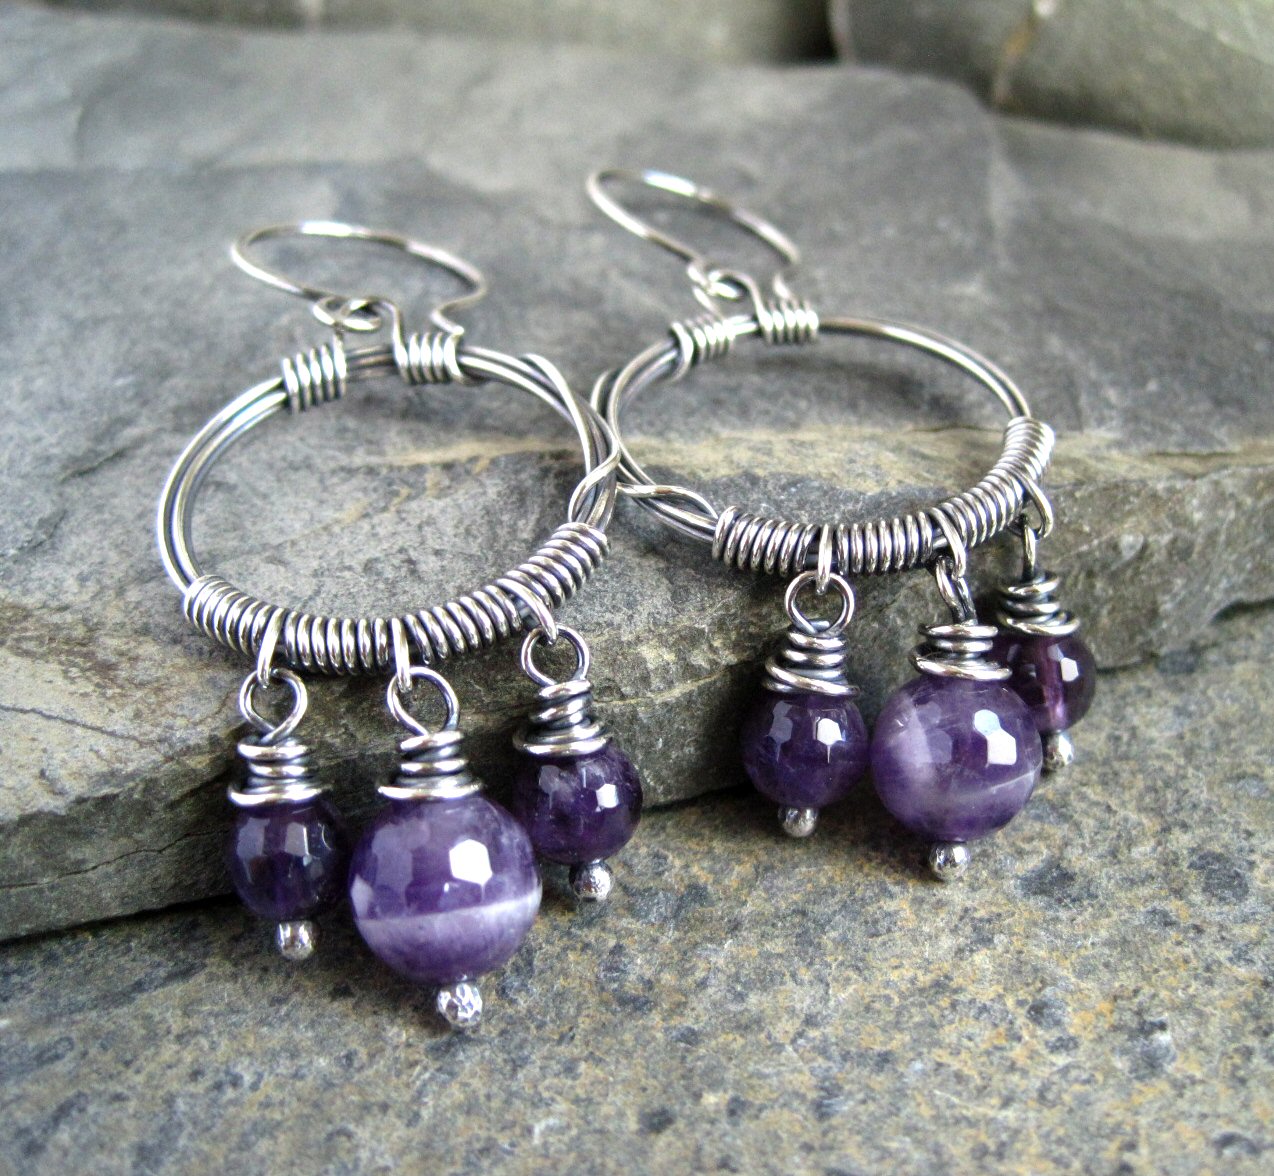
Dogtooth Amethyst and sterling silver hoop earrings made as part of my last Bead project
I twisted the copper wire for these using my Dremel
I'm planning on making more of these in other colours.....
I had fun stamping these copper discs even though I have to do it on my knees on the kitchen floor! The table I work on isn't sturdy enough and you end up with a shadow when you try and stamp on it so everything gets moved to the kitchen ~ hammer, bench block, copper, stamps...... plus at least one cat wondering what the hell I'm doing!
Sunday, 9 October 2011
Raspberry Enamel Heart Earrings
It's a fairly bright day today so I thought I'd catch up on some photographing. I managed to get 5 pairs of earrings done and I've just finished editing them including these raspberry pink enamel hearts.
I cut the hearts myself from copper sheet - I don't enjoy sawing metal if I'm honest but I am slowly getting better at it! After filing and sanding the hearts and punching the hanging hole I enamelled the back then enamelled the front with two layer of mauve opaque before adding some transparent raspberry ontop.
I love the effect you get with transparents over opaques. Transparent enamels do need to be washed before using them over opaques to help get rid of some of the "bits" that sometimes contaminate the enamel and leave imperfections in the final result. I've become a bit obssessed when I use my washed transparents and always check them to see if there's any black bits, bits of hair or wire wool in them before using them as once they're fired any bits thats show up cannot be removed - most frustrating!
I'm glad to say these turned out ok : )
I cut the hearts myself from copper sheet - I don't enjoy sawing metal if I'm honest but I am slowly getting better at it! After filing and sanding the hearts and punching the hanging hole I enamelled the back then enamelled the front with two layer of mauve opaque before adding some transparent raspberry ontop.
I love the effect you get with transparents over opaques. Transparent enamels do need to be washed before using them over opaques to help get rid of some of the "bits" that sometimes contaminate the enamel and leave imperfections in the final result. I've become a bit obssessed when I use my washed transparents and always check them to see if there's any black bits, bits of hair or wire wool in them before using them as once they're fired any bits thats show up cannot be removed - most frustrating!
I'm glad to say these turned out ok : )
Subscribe to:
Posts (Atom)